Get Started
Thank you for purchasing our app
Please read the documentation carefully , and if you have any question check us . Most pages are accompanied by a video tutorial , it's recommended to check both , the video and the written Documentation .
Must Read this:
After purchase if you run the project and test the build in phone it will not work becuase you have to setup the Web API first then app will be works fine.Web API is in PHP 7.0 and it will work on any kind of hosting packages
Android Configration
In order to start configuring , you need to install Android studio and the 'Java SE Development Kit'. First download the android studio from here Android Studio
SDK Manager
The installer , as also shown in the video should automatically download and install all required components . if you want to do manual setup , download at least the following components using the SDK manager
- SDK tools
- SDK platform Tools
- SDK Build Tools
- Google Play Services
- Android Support Library
- Google Repository
- Google USB Driver
You can download these SDK , if not installed already , using the SDK manager SDK Manager After you're done, you can open Android Studio and continue.
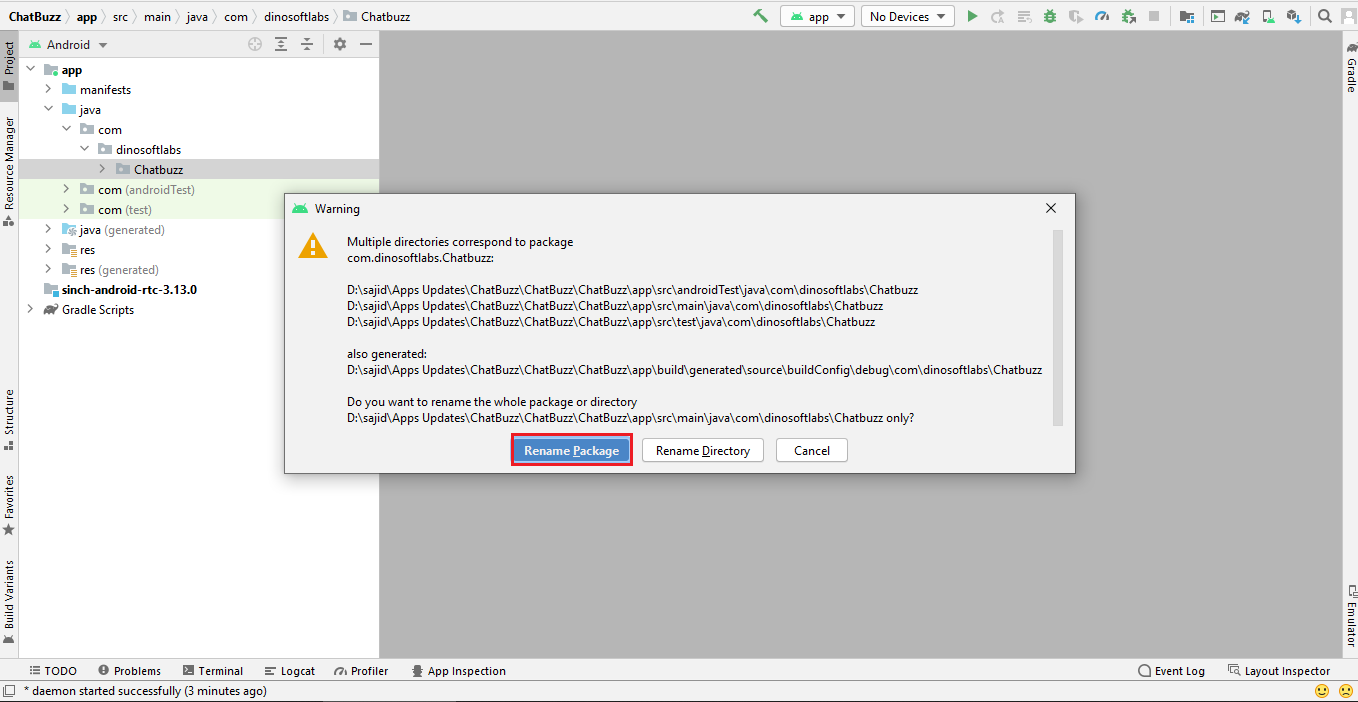
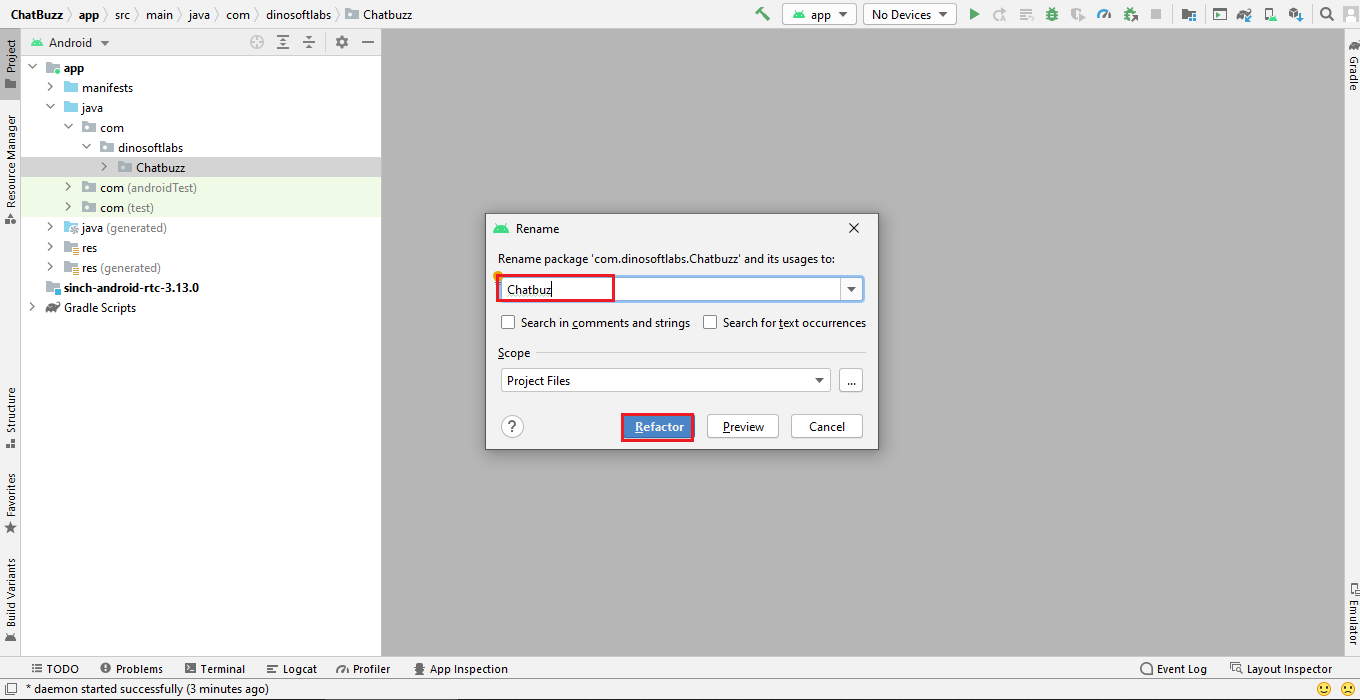
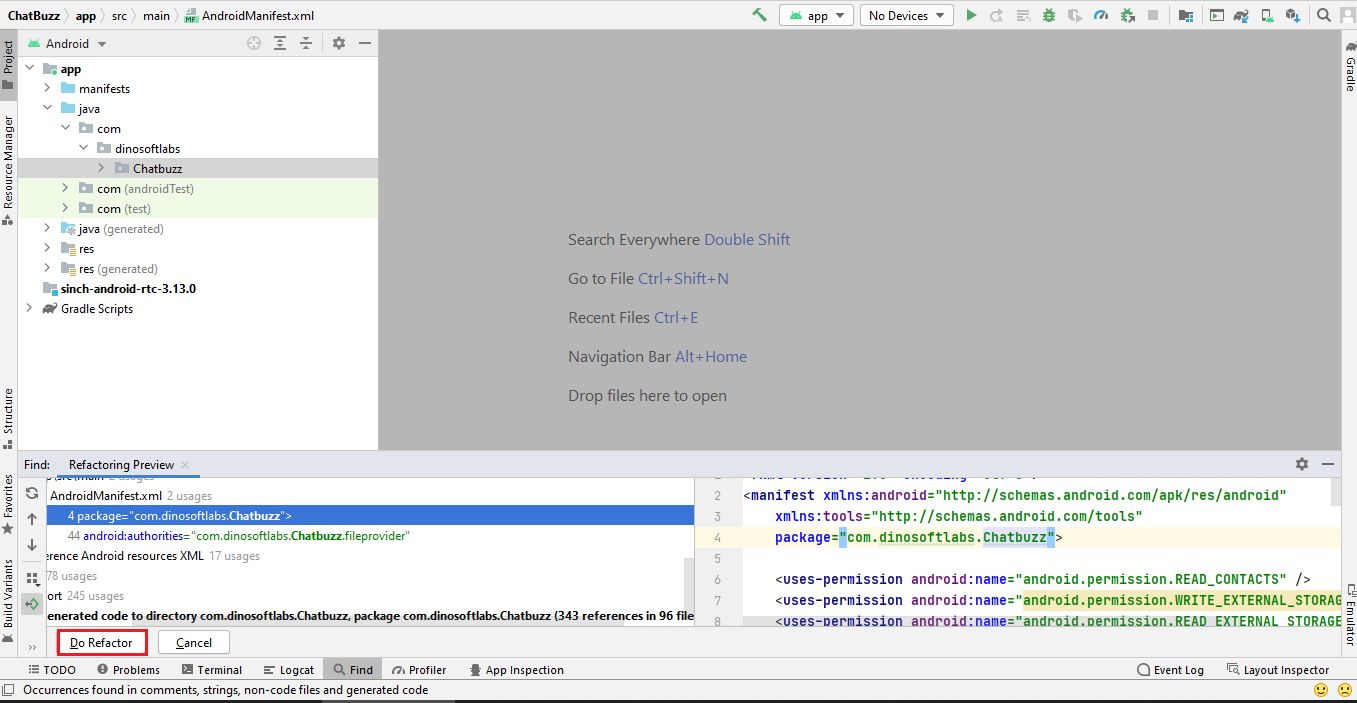
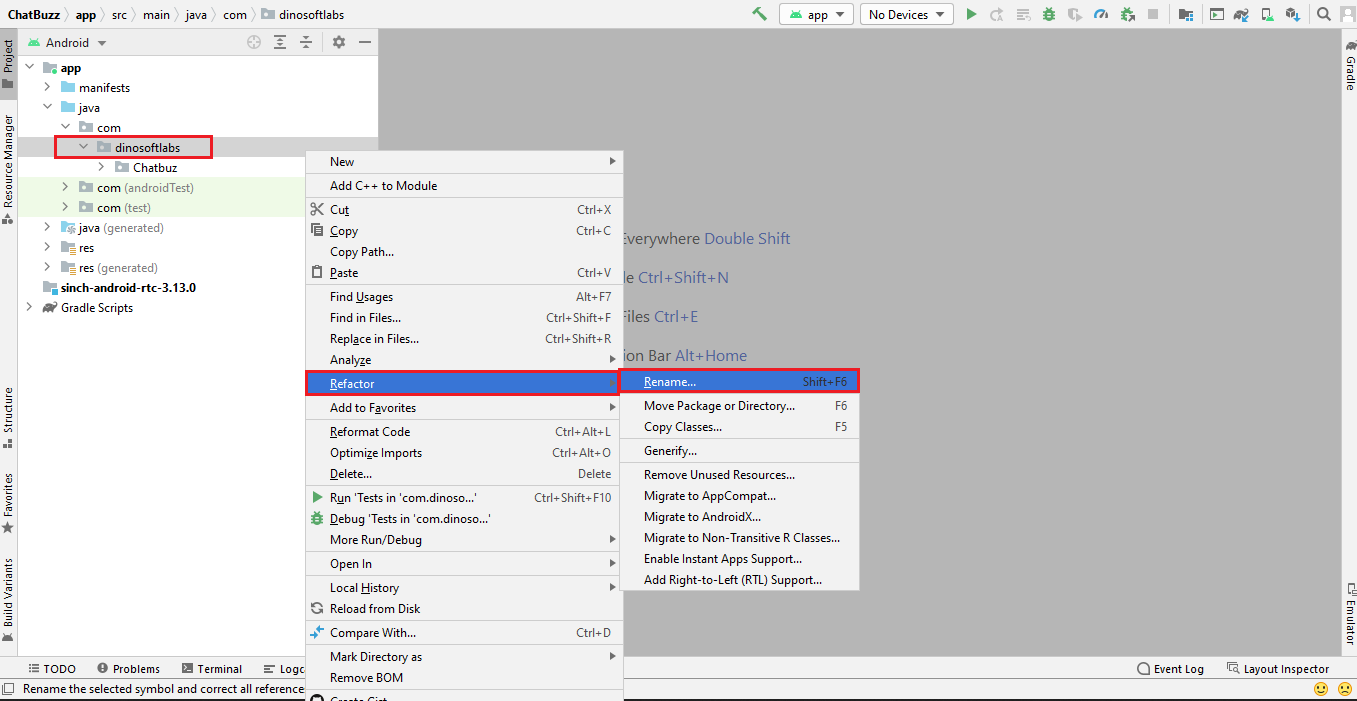
Importing Android Project and Change Package Name
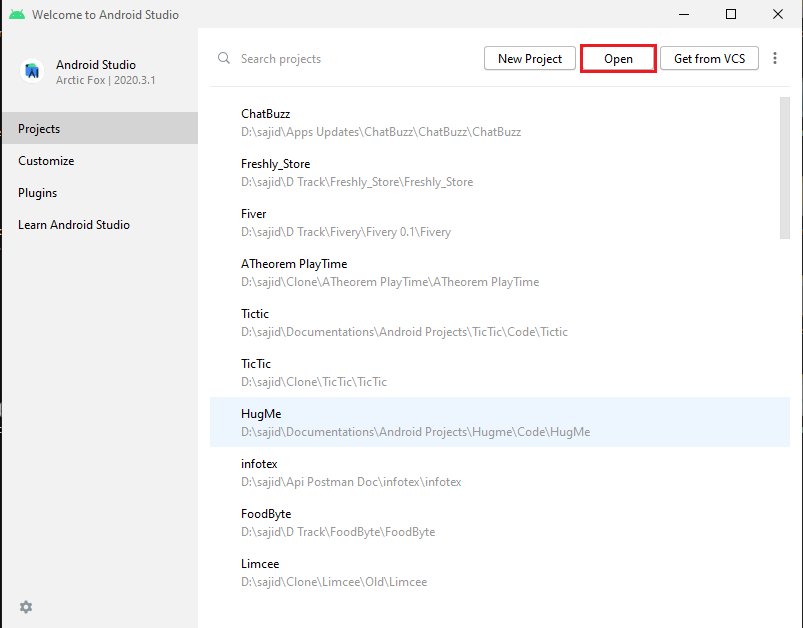
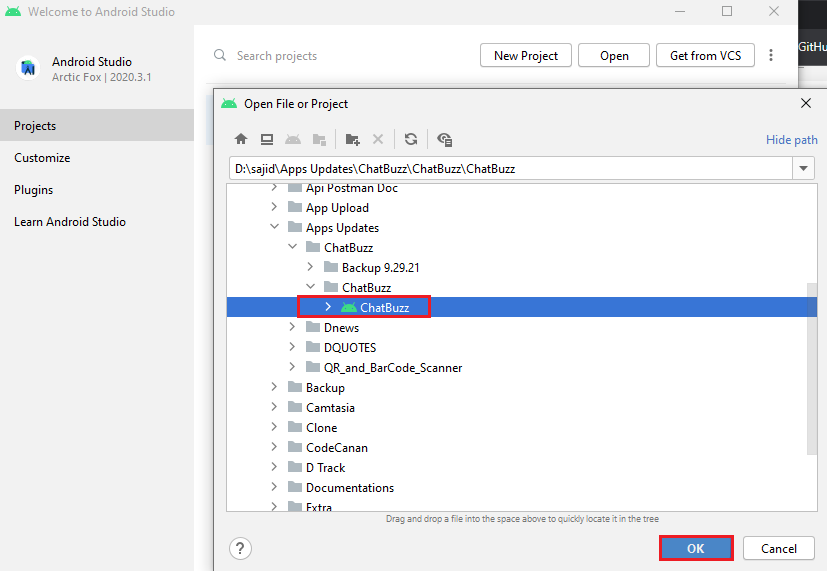
To import the template, simply open Android Studio and import/open the template. Make sure to wait for all the processes (the Gradle Build) to complete before continuing to the next step
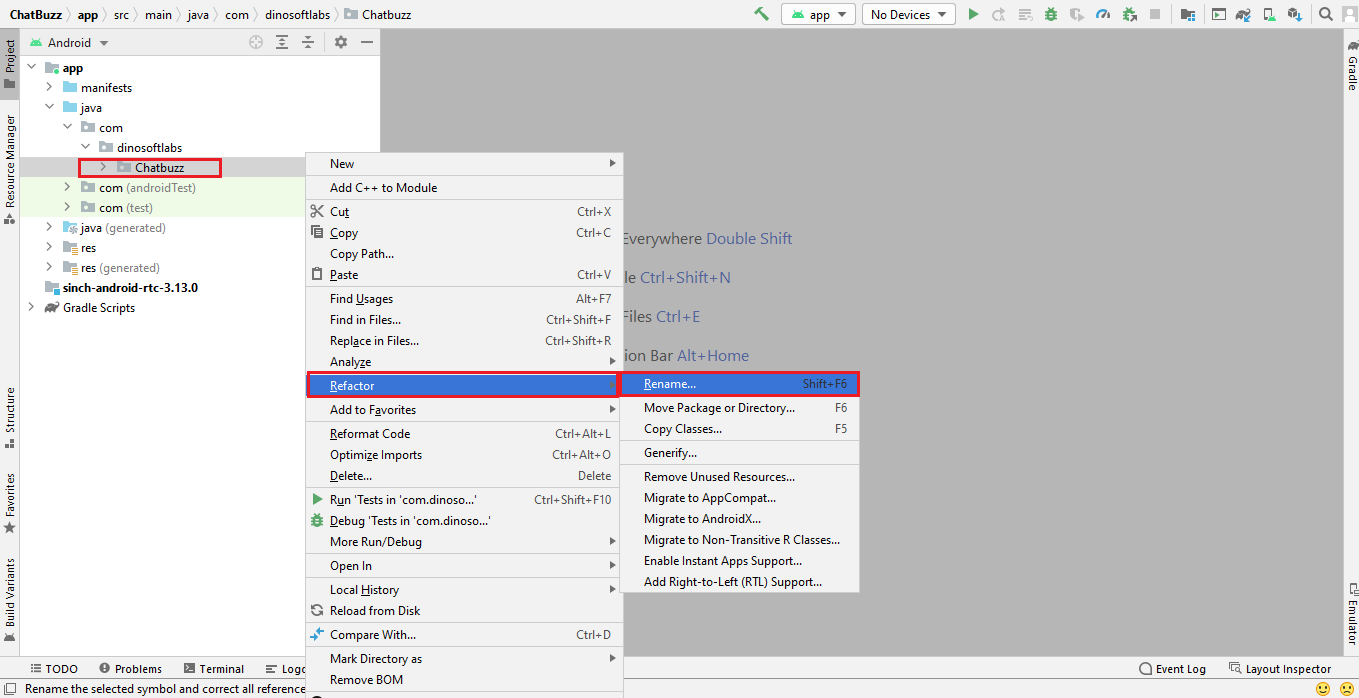
Change Package Name
Addition steps
Sometimes, the Gradle Build fails. In some cases additional components are needed, Android Studio will ask you to do download these additional SDK components in the 'messages' tab, simply follow the instructions provided to install and download the additional components.
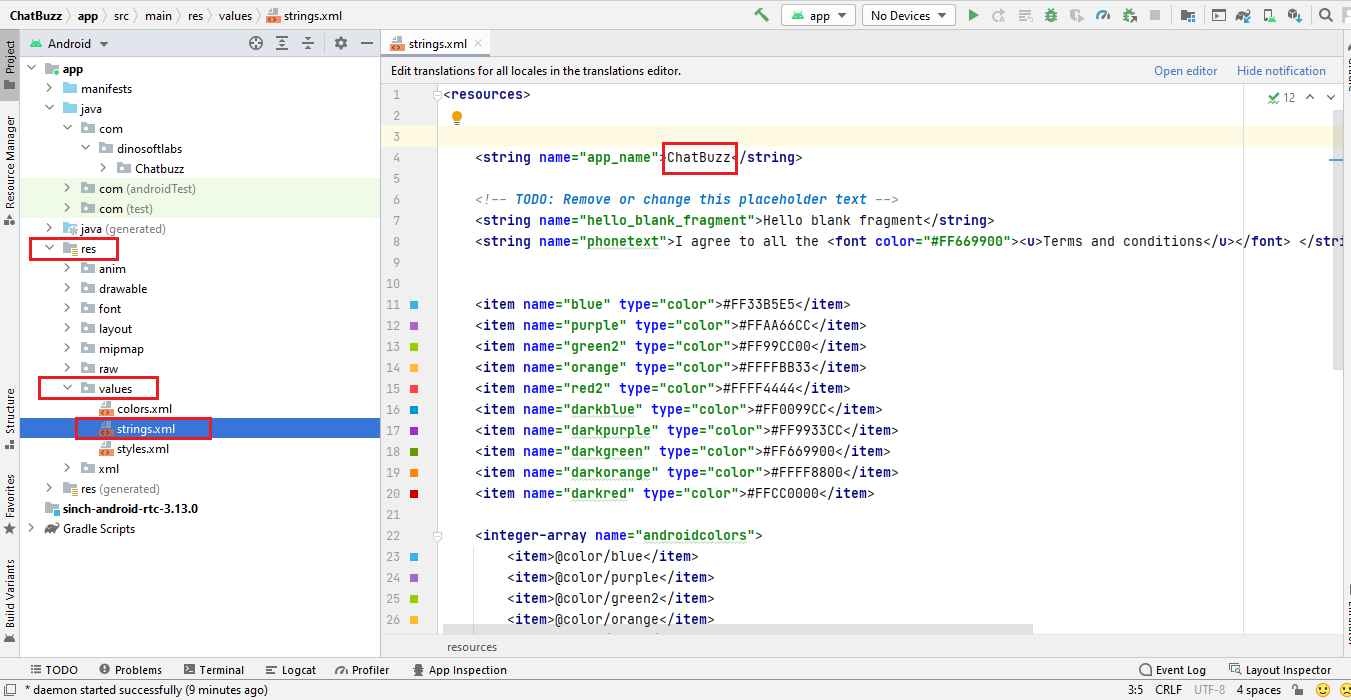
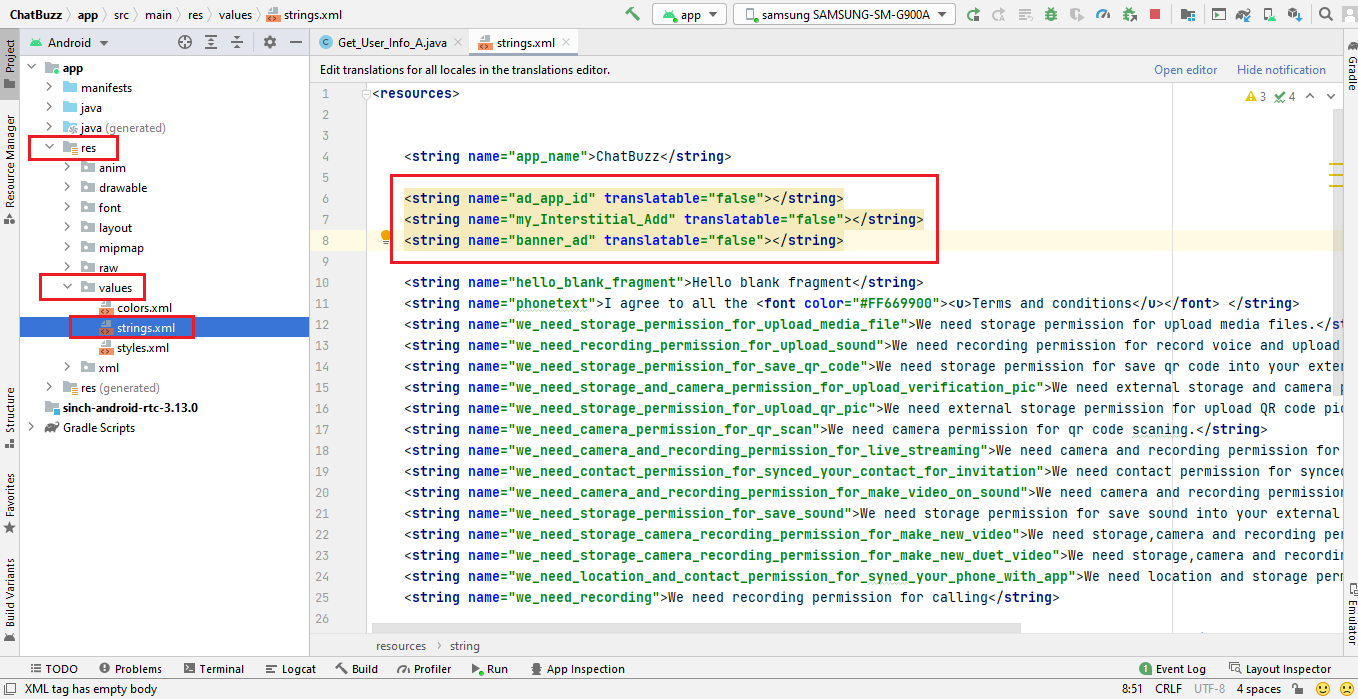
Change App Name
Below is illustrated how you can change the name of the application.
Go to app->res->values->strings.xml
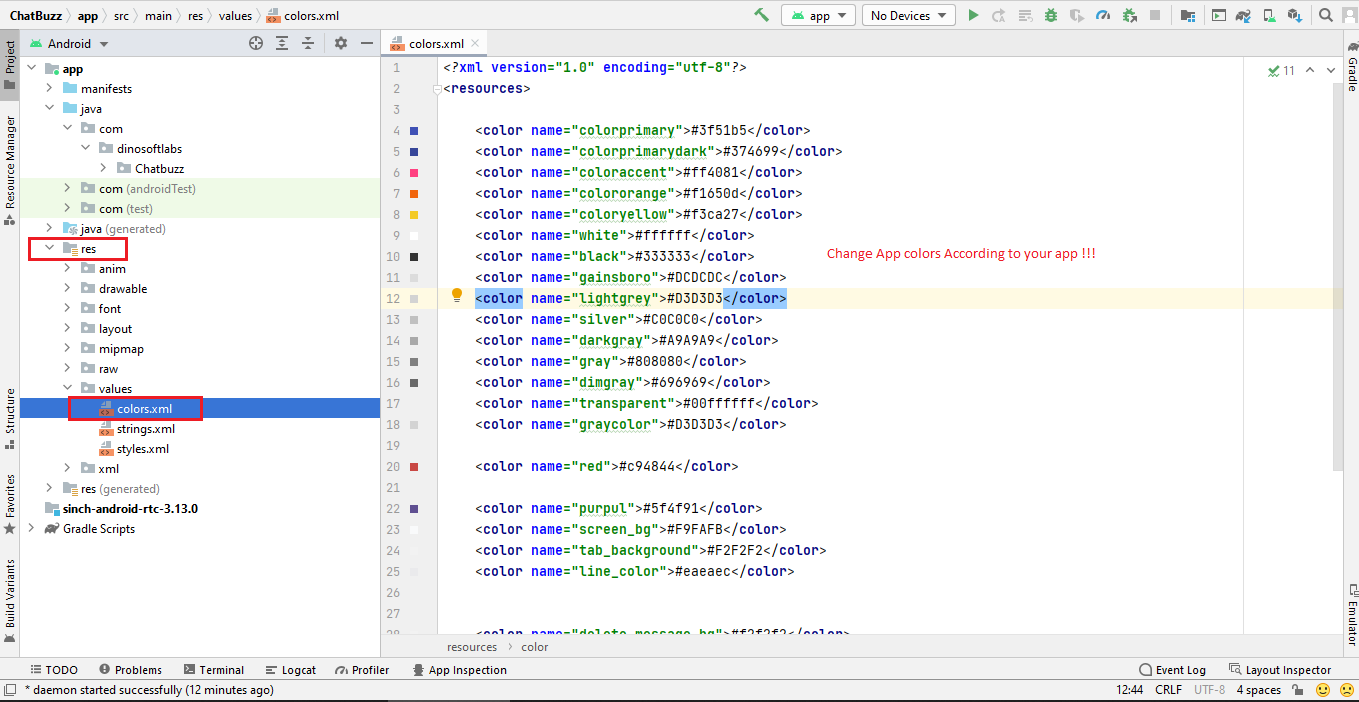
Change Color Scheme
Below is illustrated how you can change the color of the application.
Go to app->res->values->colors
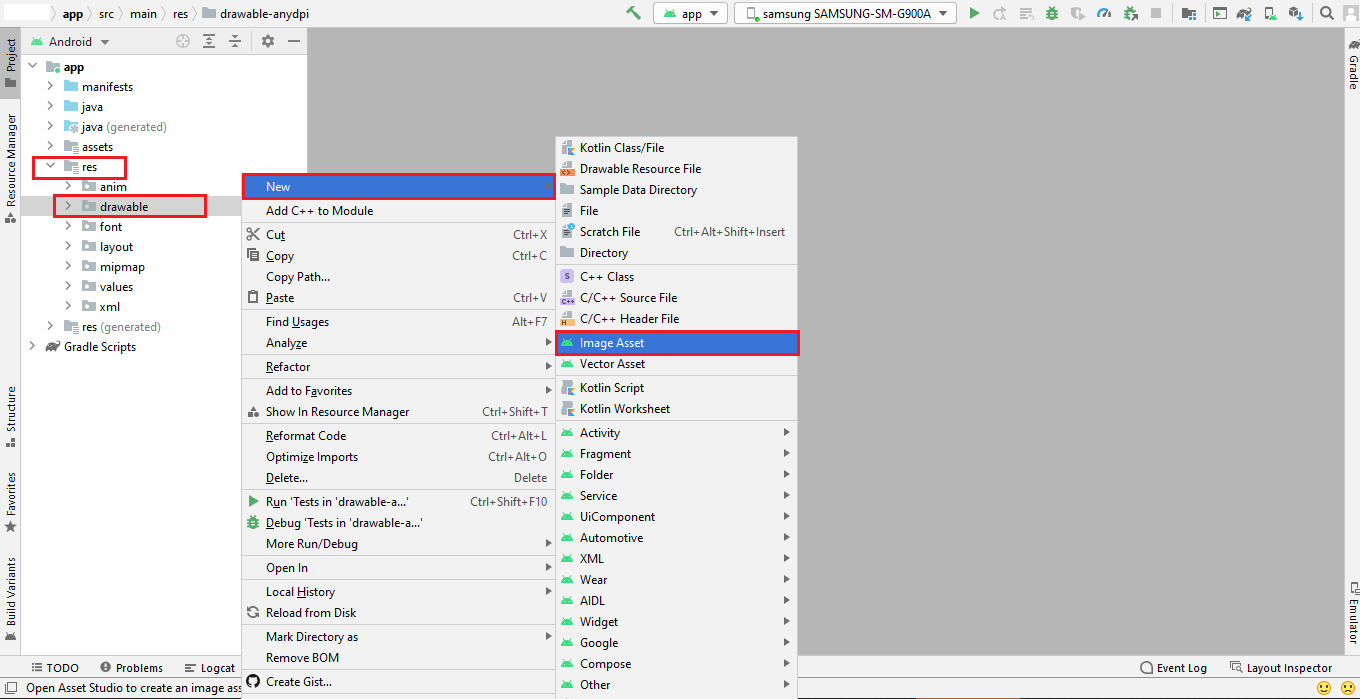
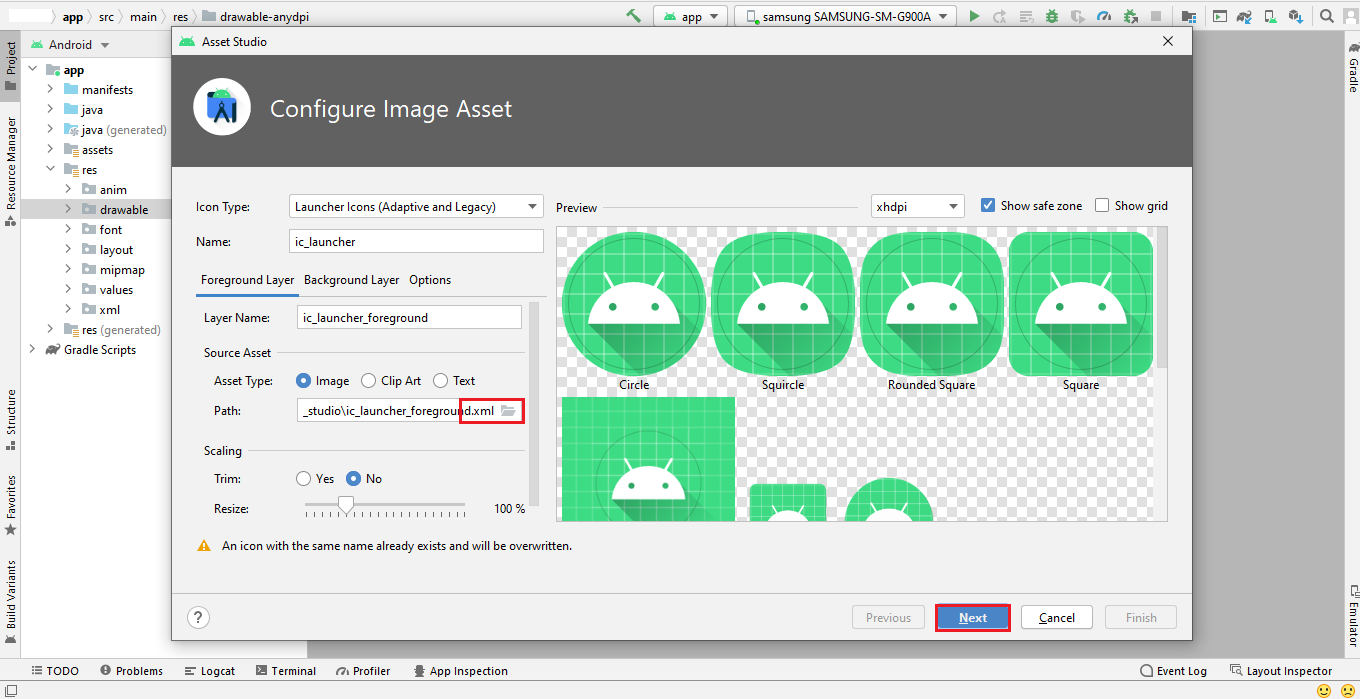
Change App icon
Here is the helping video for Changing the App icon
Before changing the App icon you should ready your App icon into PNG format.

Change Splash Screen
We need to put a png file with named 'splash' in the following folder:
Go to project location->app->src->main->res->drawable
Setup AdMob
For Ad Mob setup you need ad mob id's which you get from your ad mob account. If you have no ad mob account then go to this
URL: https://admob.google.com/home/ make an account, get id's and paste in app as metioned below.
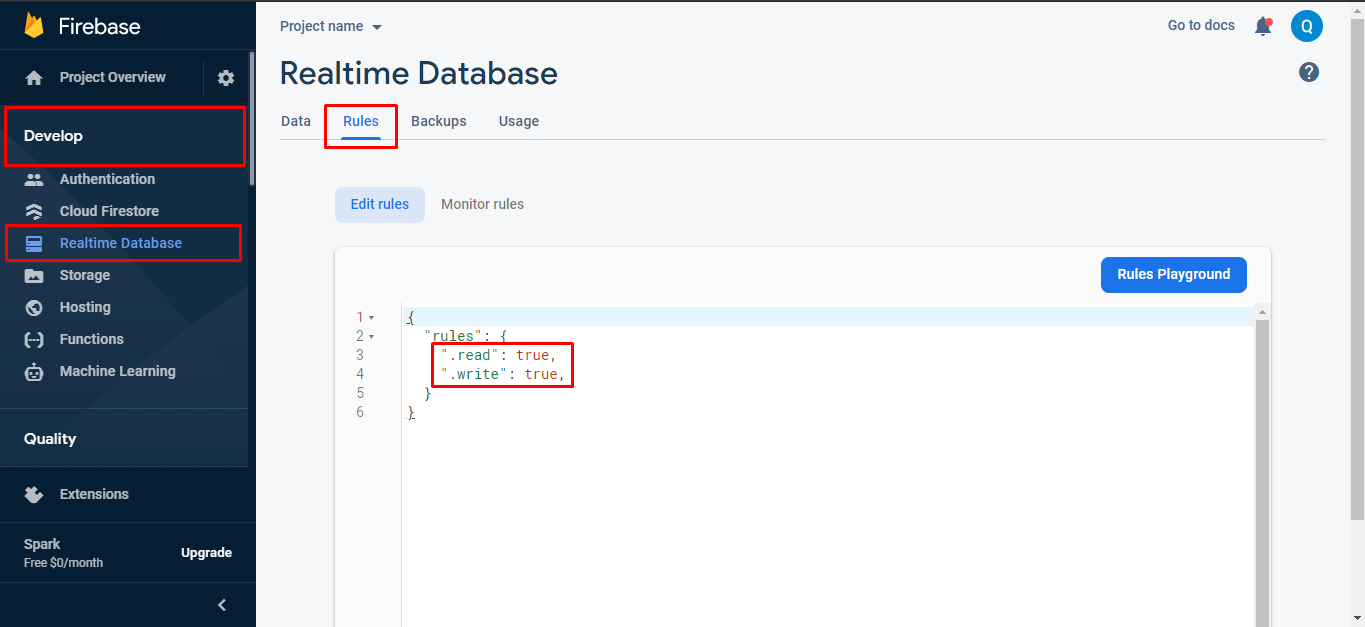
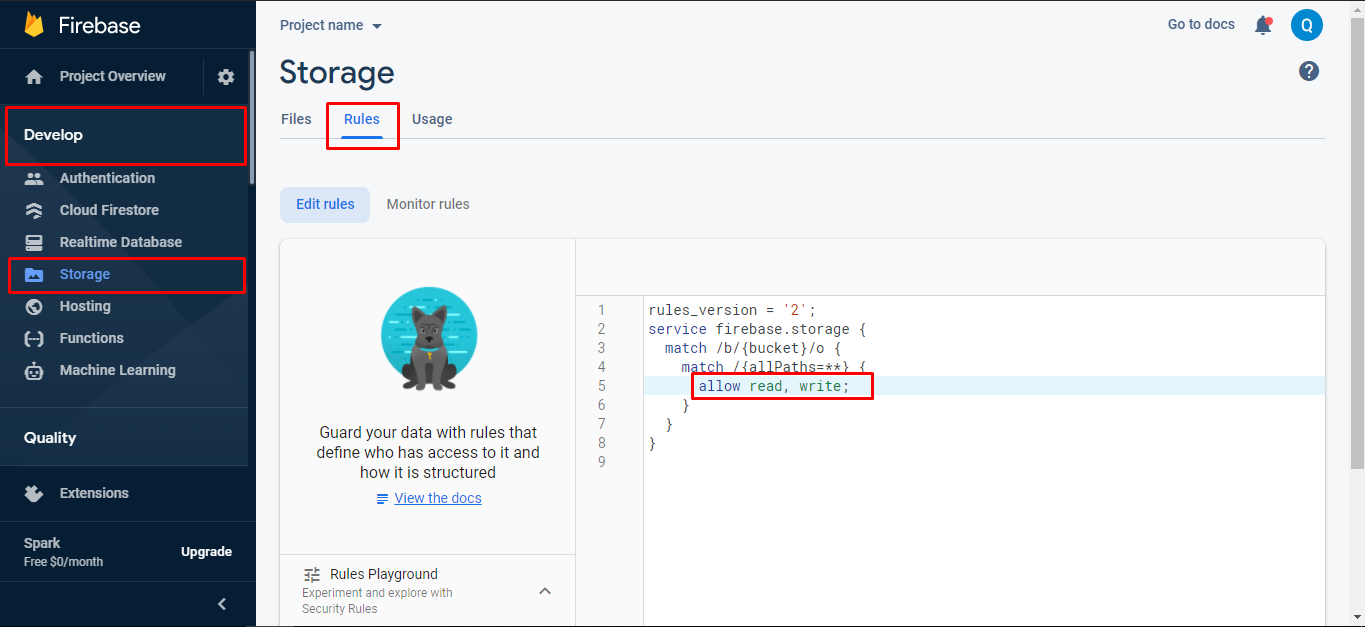
Firebase Configuring
if you did not change the firebase rules some of the app functions will not work like chat or save/change pictures.
Debug and release Key
Before going to next you have to learn about the SHA1 key for both debug and release. if you are in the development mode then you will use the debug SHA1 key but when you going to publish the app on play store then you will have to use the SHA1 key of Release key.
First you will check your android studio version here i mentioned how you can check.
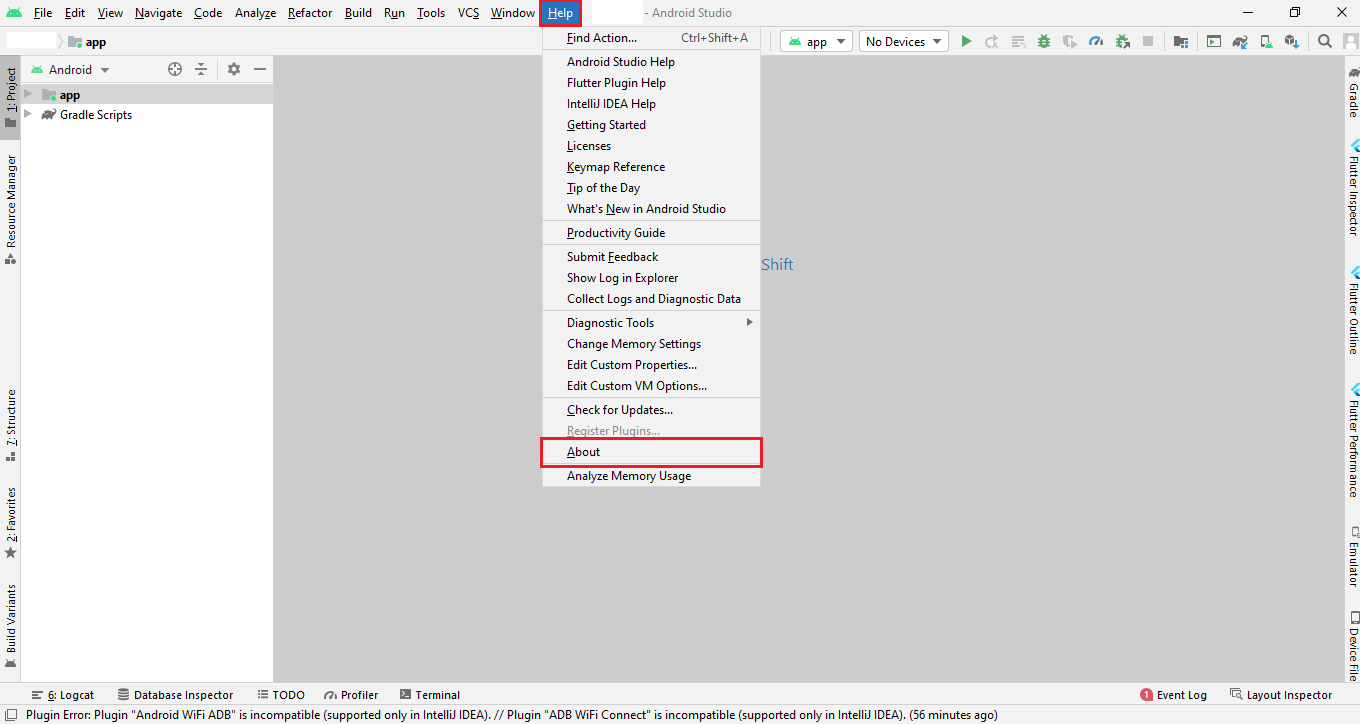
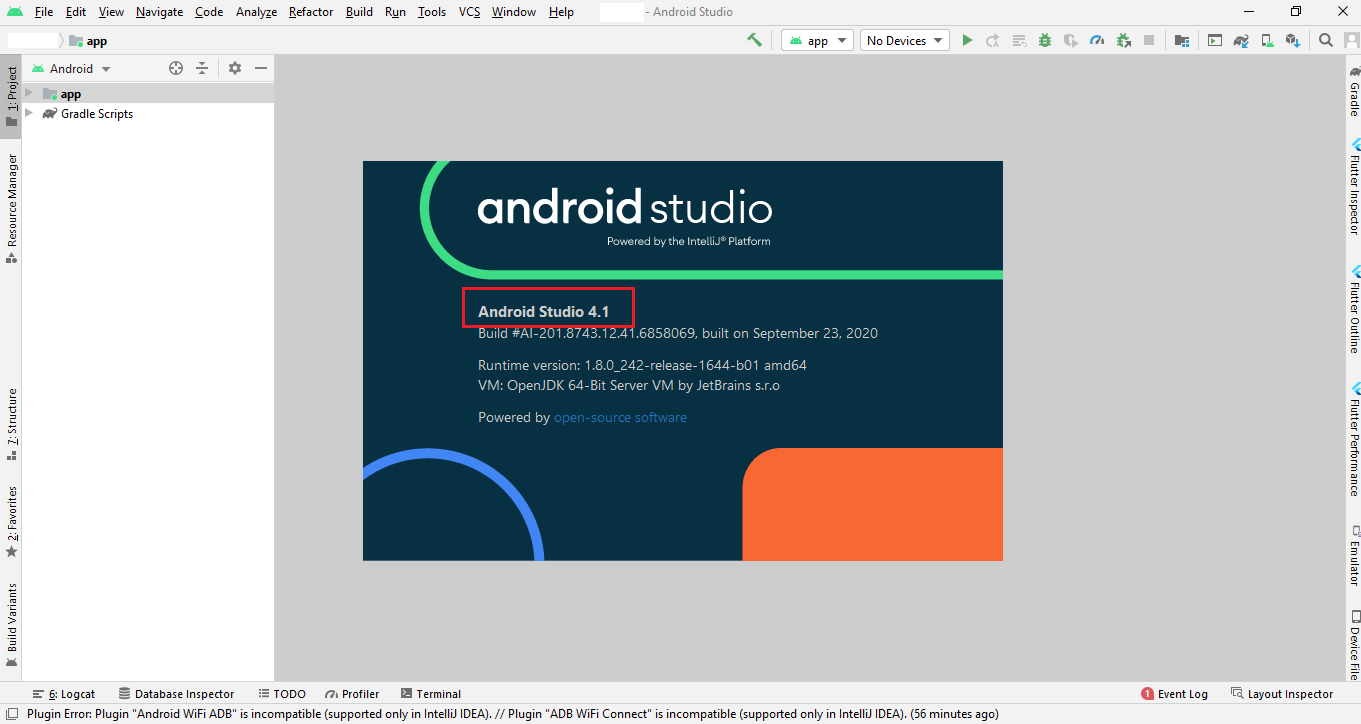
if your current android studio version is less than or equal to 4.1.1 then you will follow step 1 otherwise you will follow step 2 to get SHA1 key..
Step 1
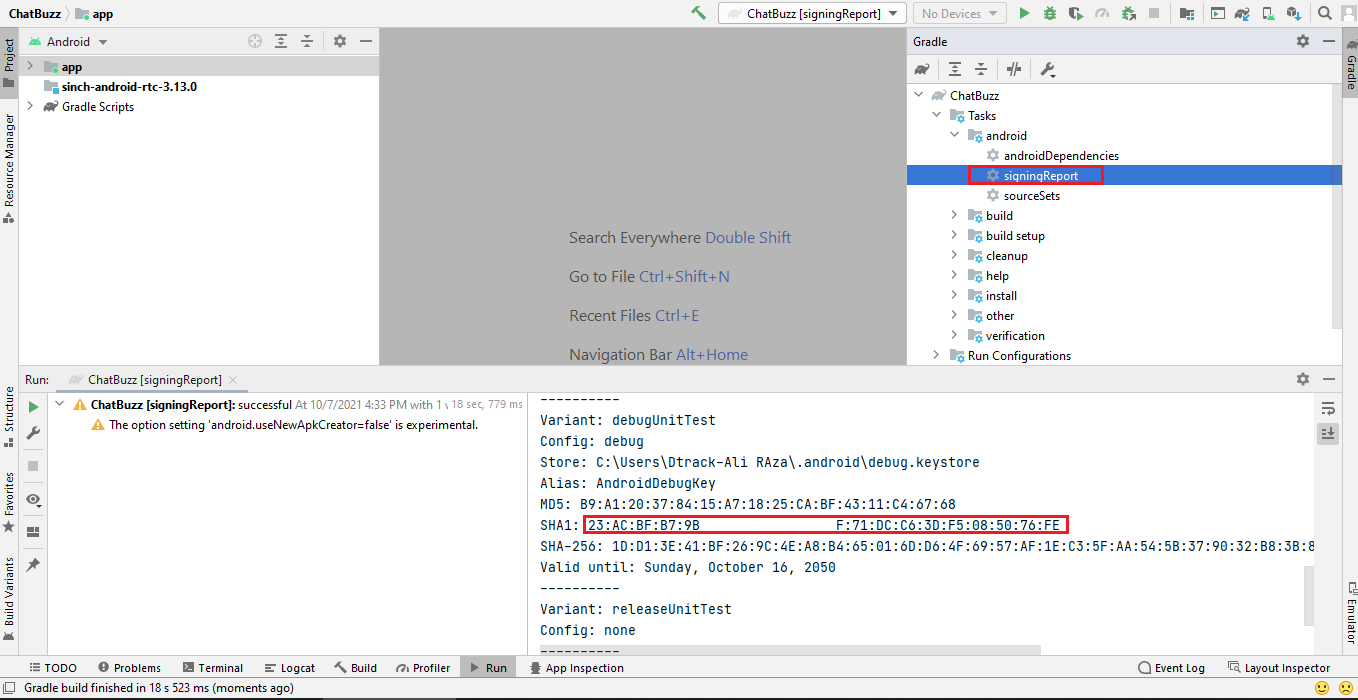
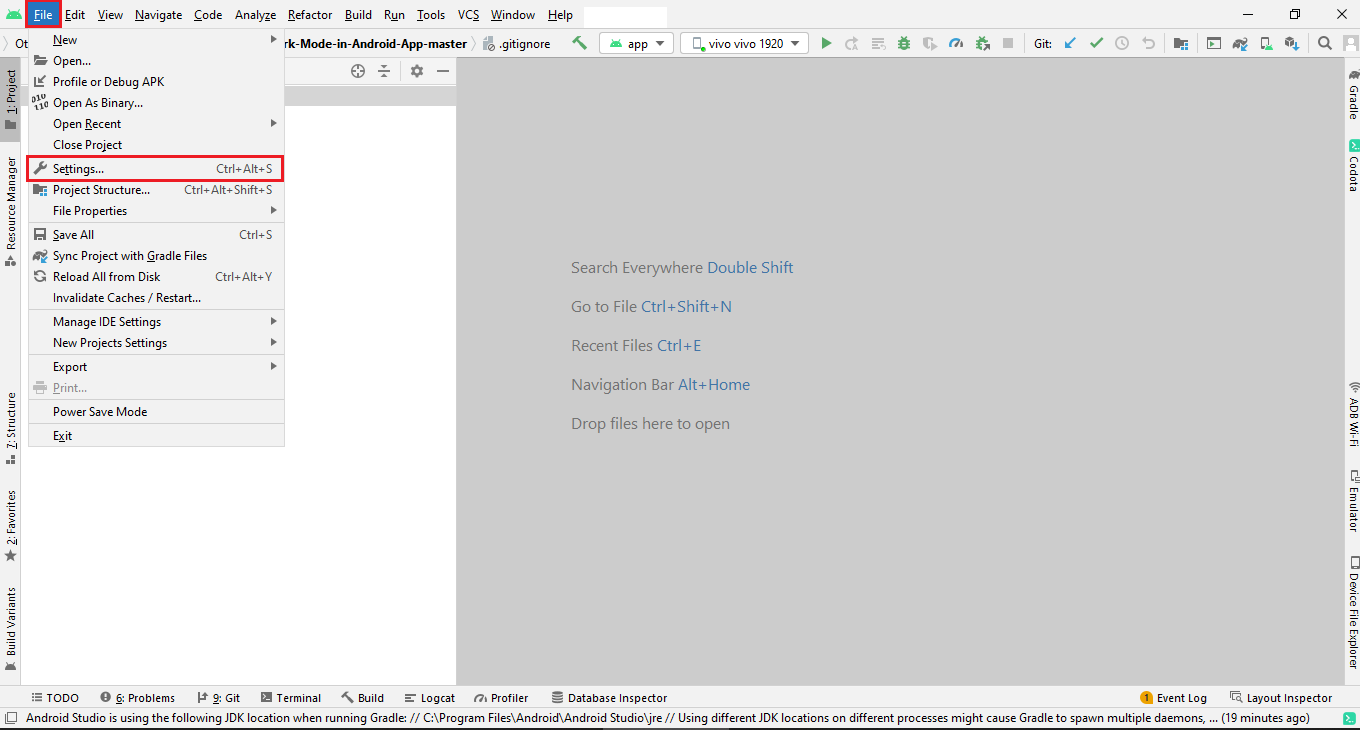
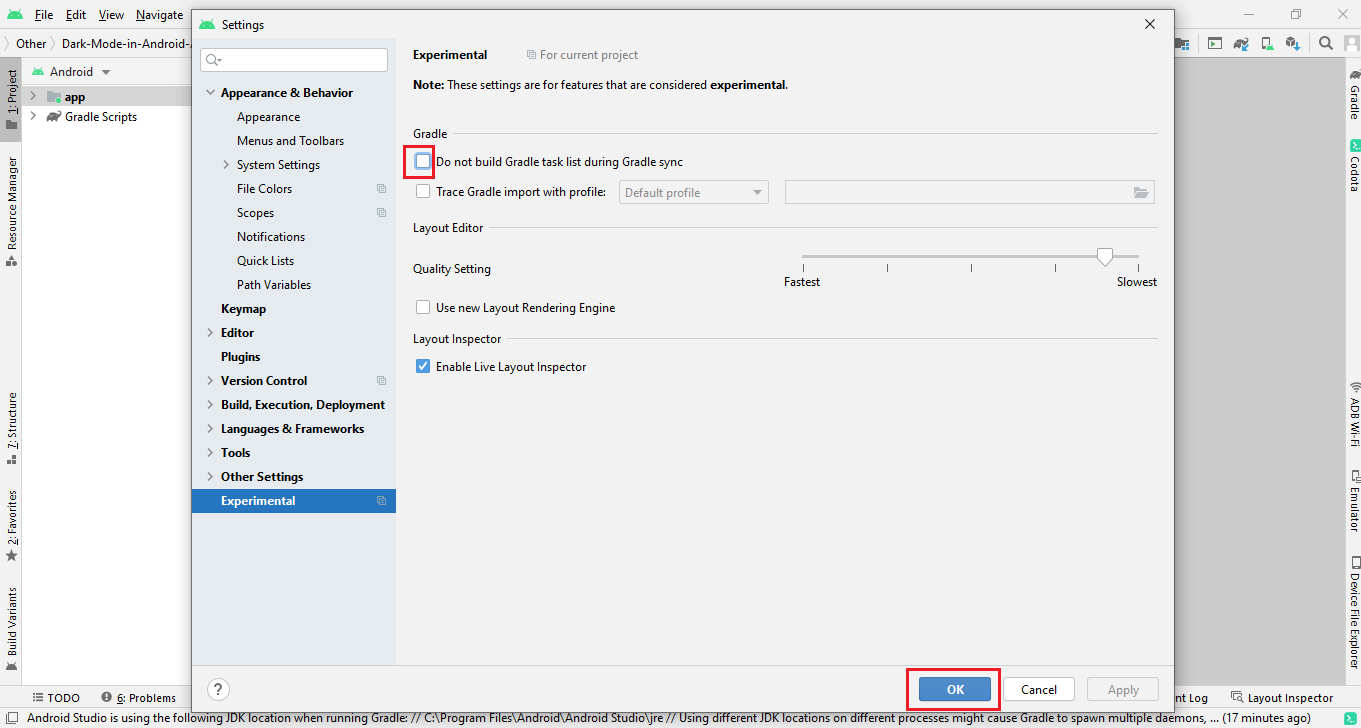
Step 2


Method 1 How to get the SH1 key for the published app (Signed or release key)
To get realese sh1 contains two step.
Step1: you will generate your own app signing key Create signing key
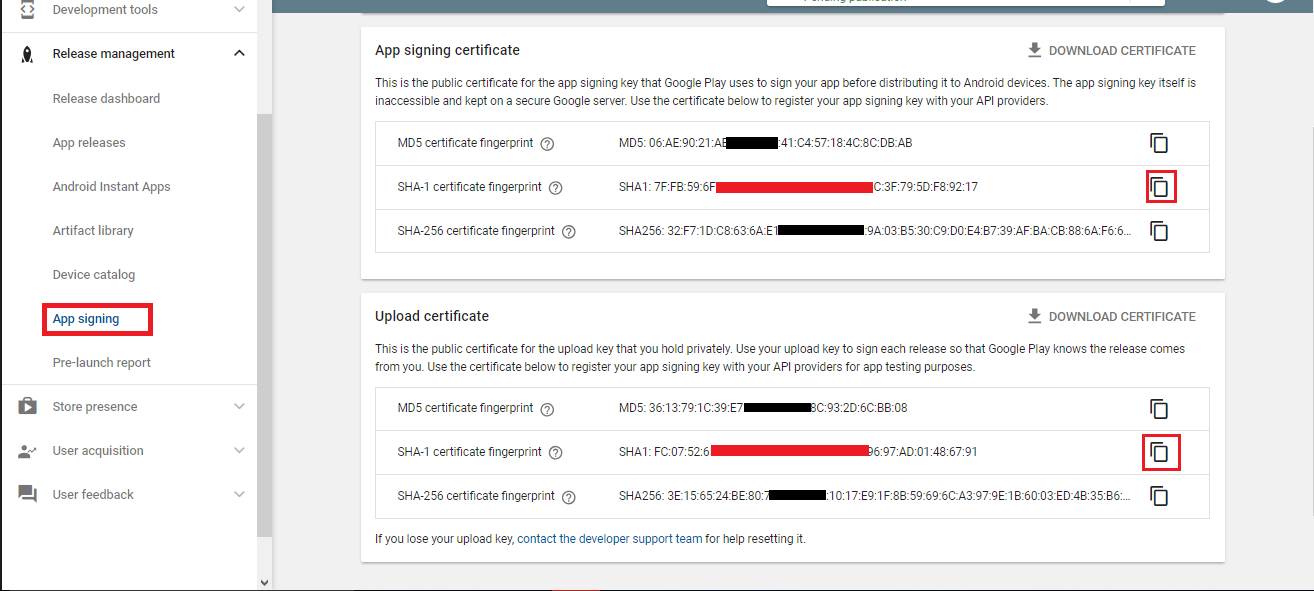
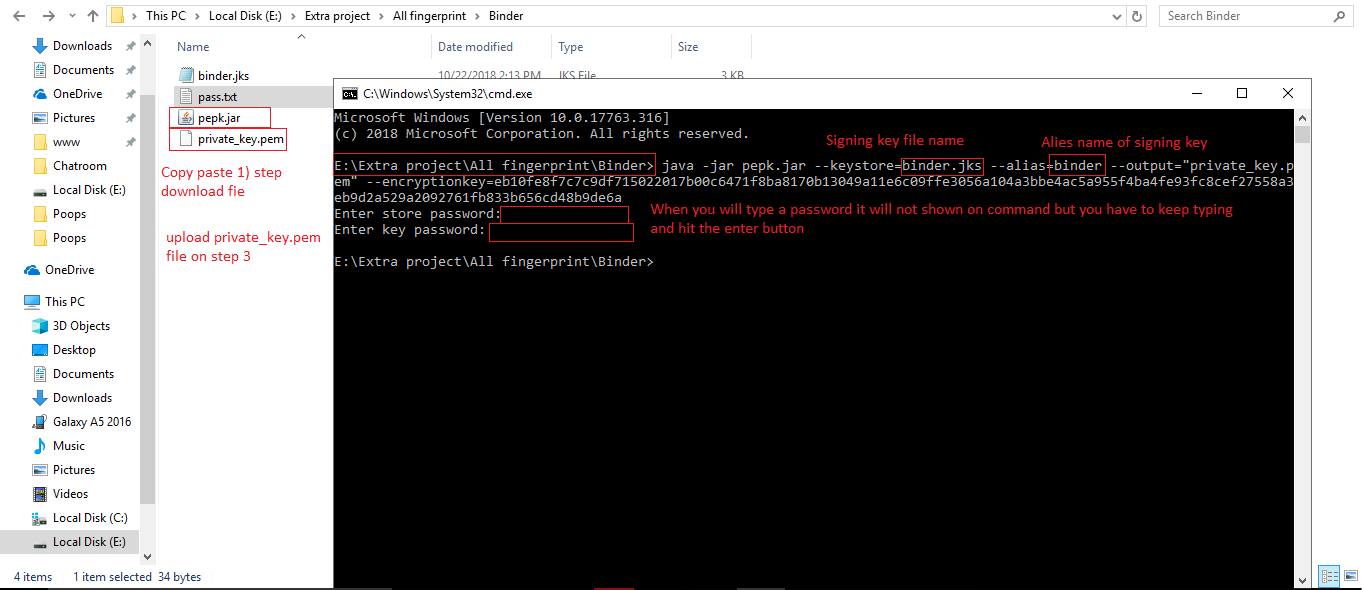
Step2: Get the Sh1 key of app signing key
Get the Sh1 key. Run the below command on Command Promt
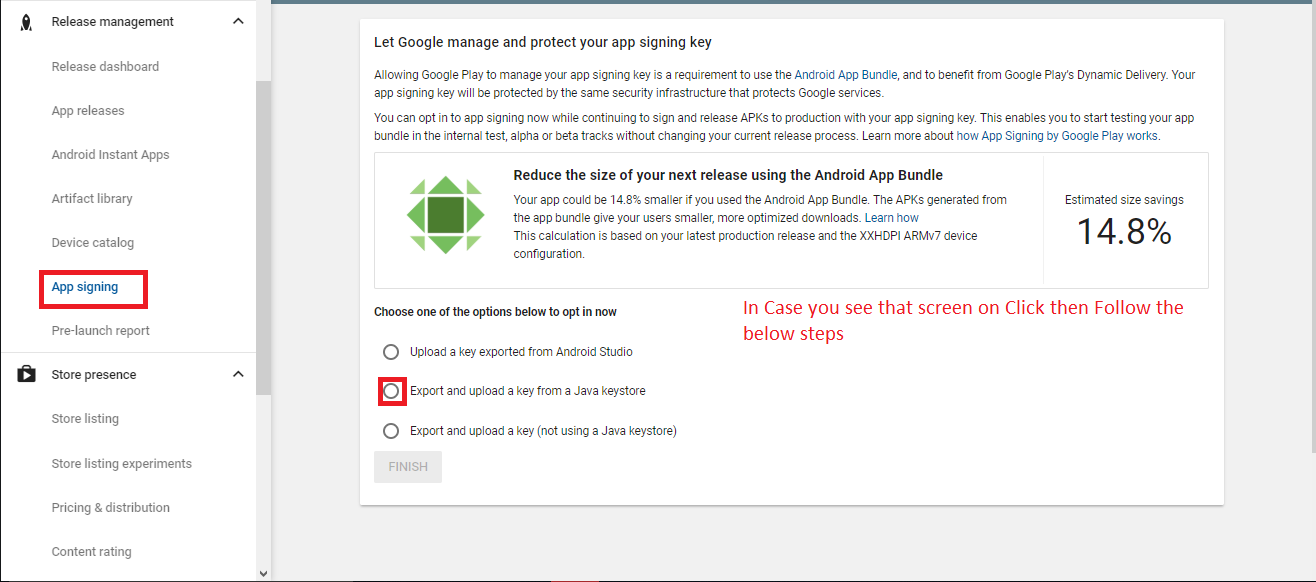
Method 2 How to get the SH1 key for the published app (Signed or release key)
Follow the steps
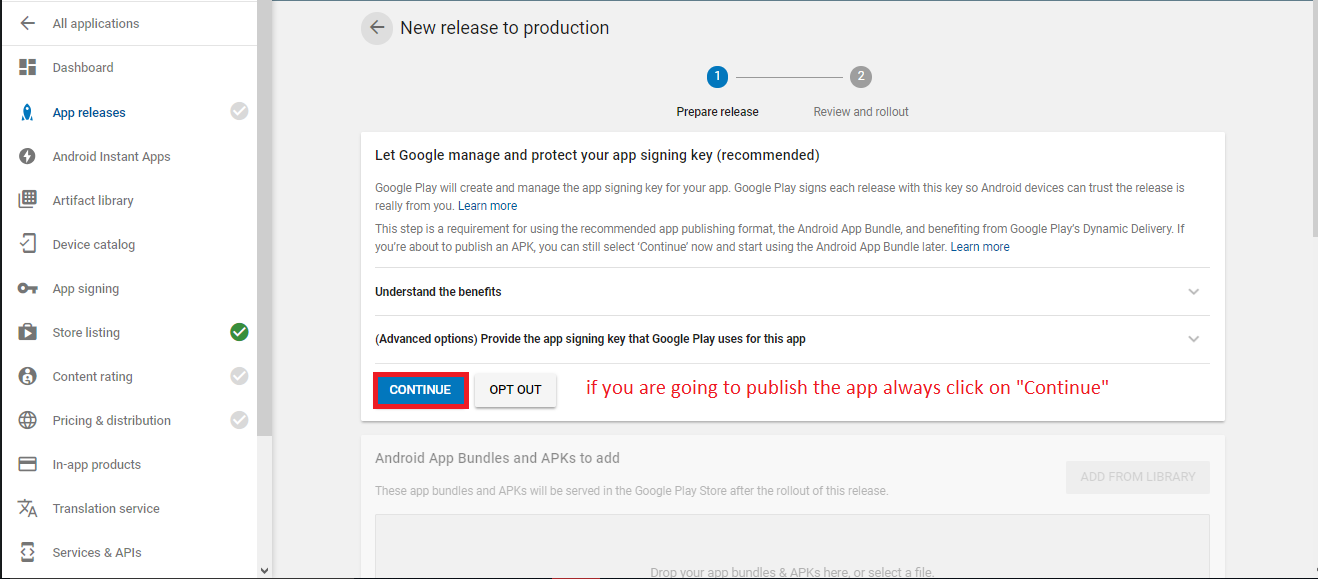
If you are see this screen that means you have the SHA1 keys
If you already have keys then you have to follow the phone number login step

Voice & Video Calling
Twilio configuration
Twilio is use for audio and video call in the project.In the below steps we will tell you have to create a link for getting the access token which will use for audio and video calling.
Step 1 - Go to https://www.twilio.com/ and signup. After signup you will see the dashboard.
After click on menu option you will see this all option now click on the highlighted option

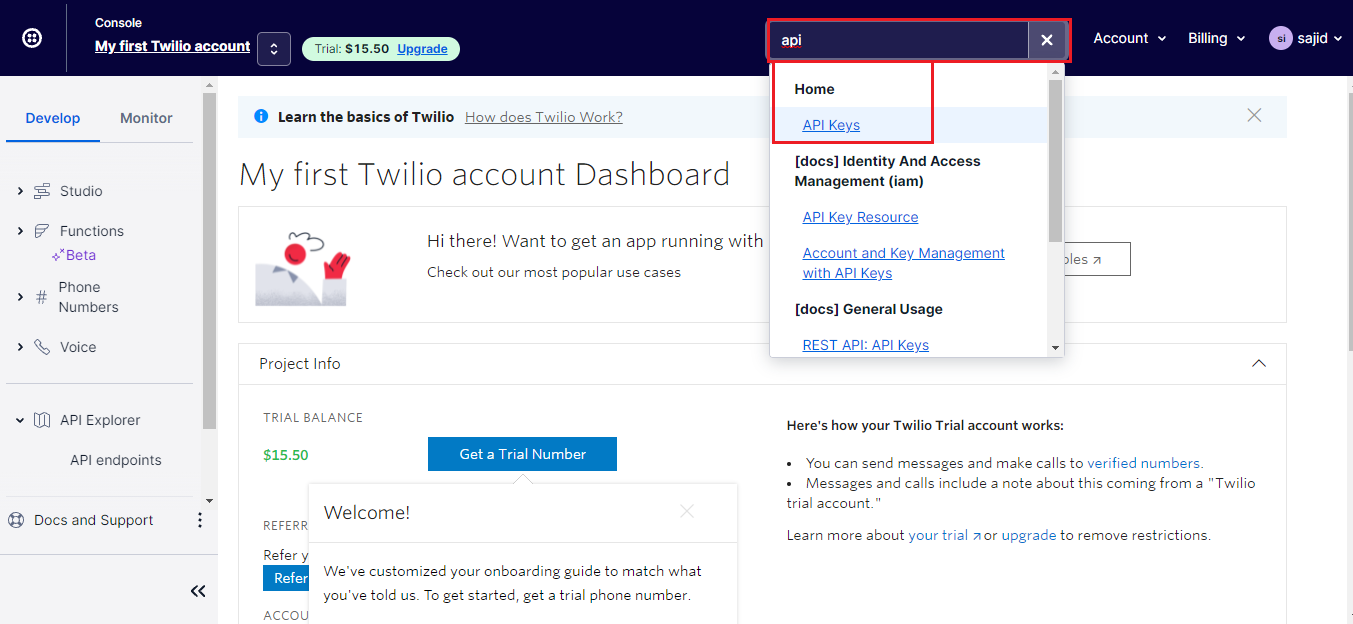
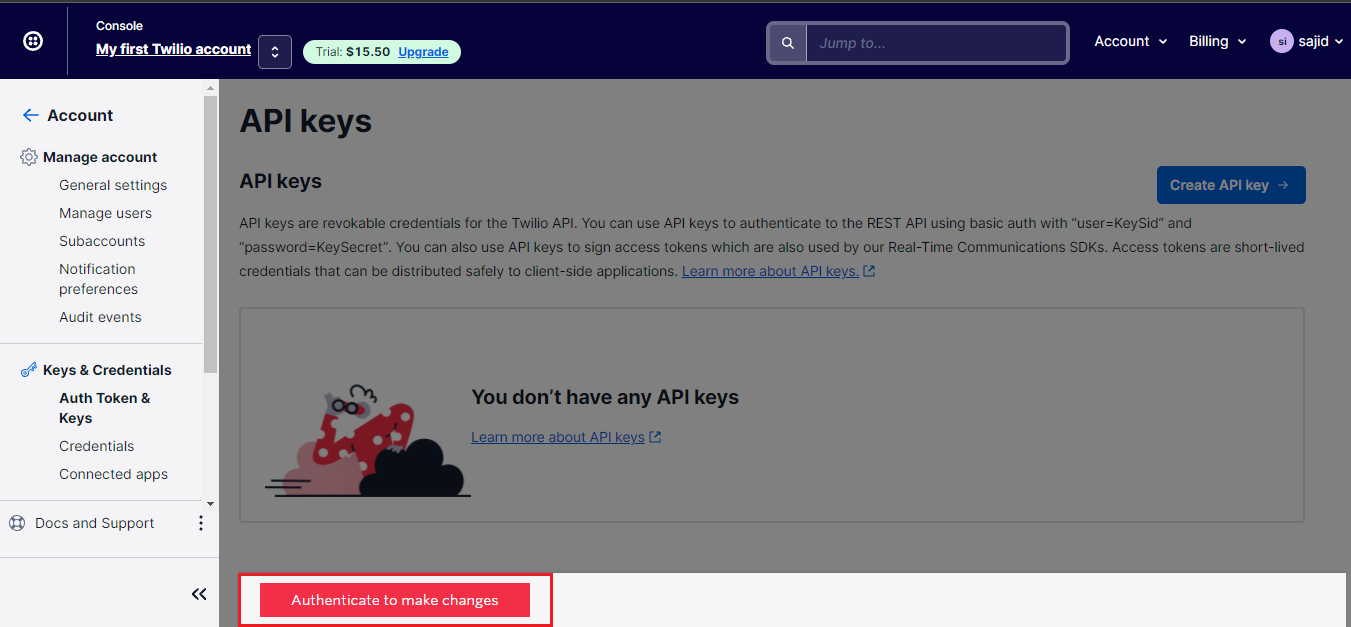
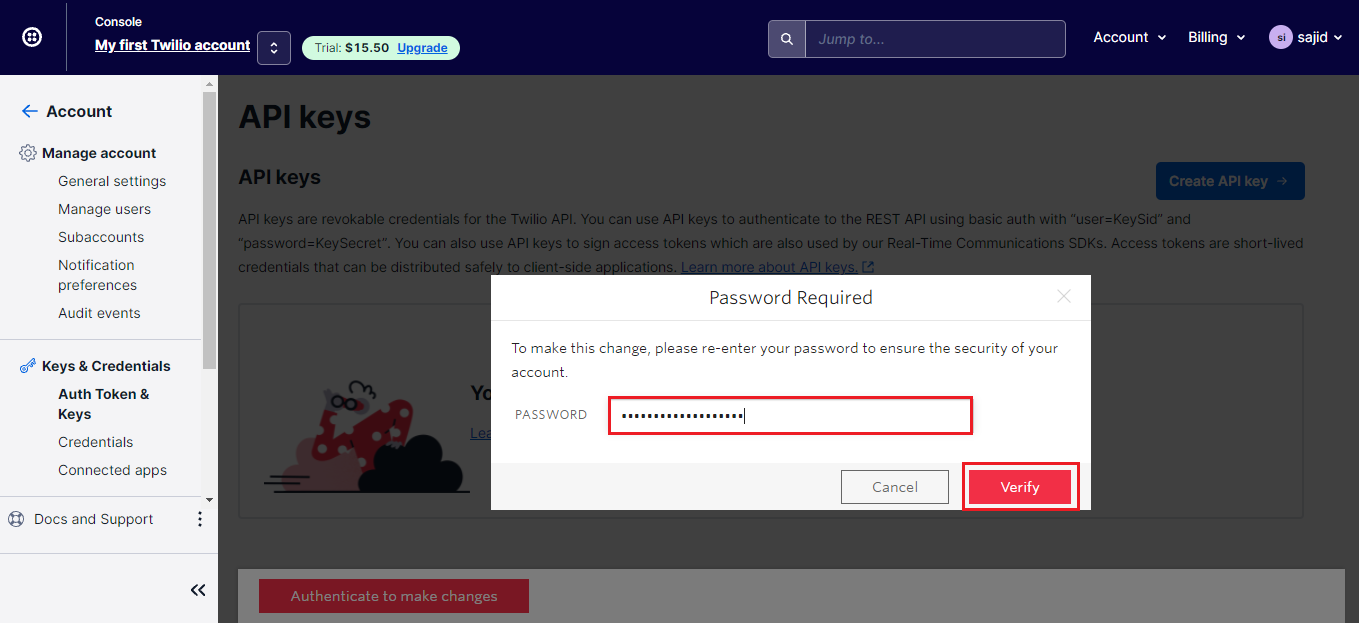
Step 3 - After that go to tools and then create the api key.
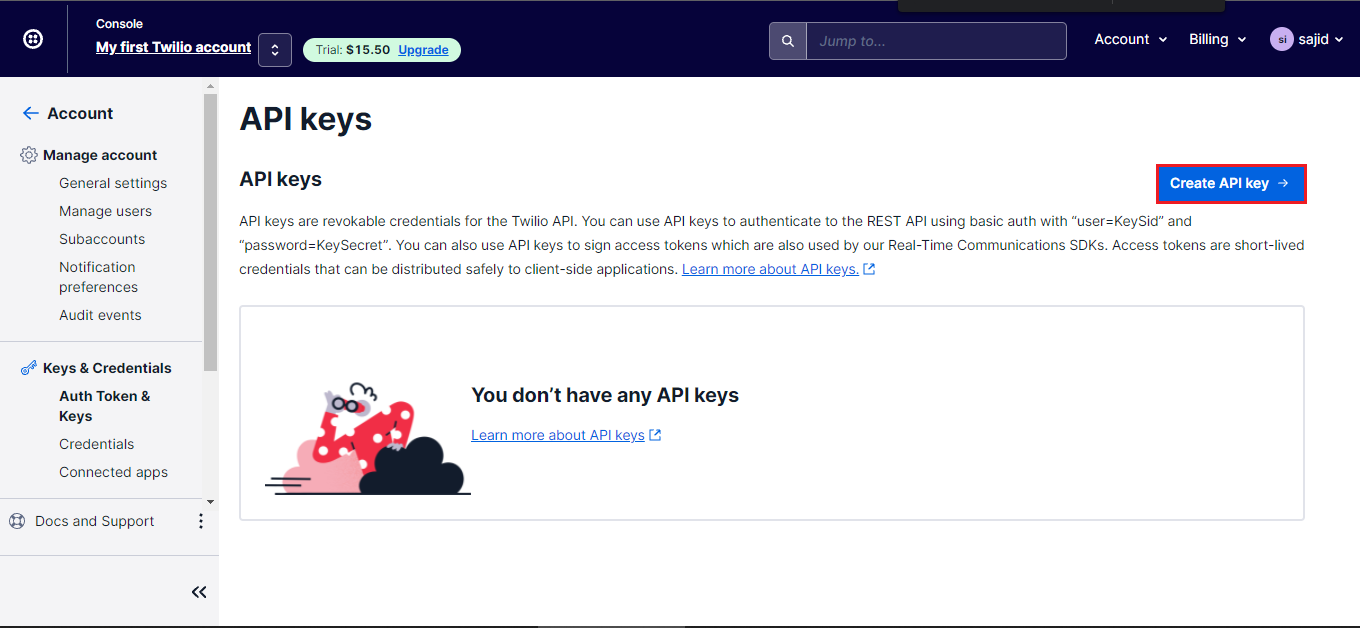
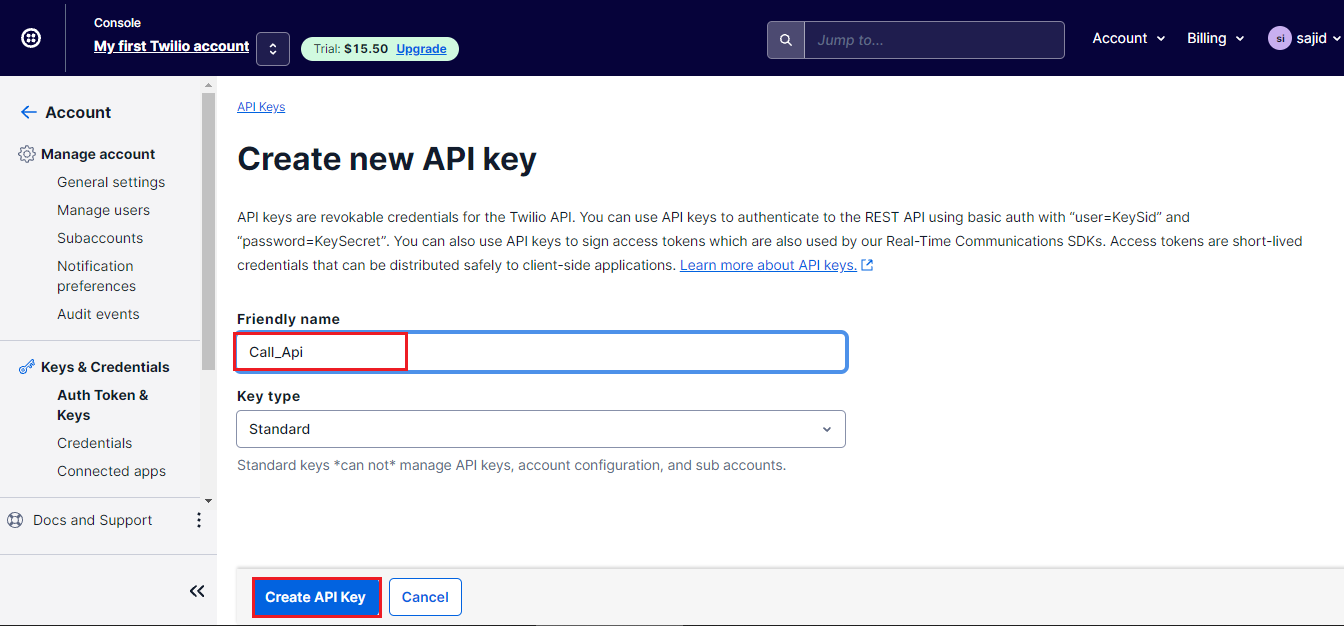
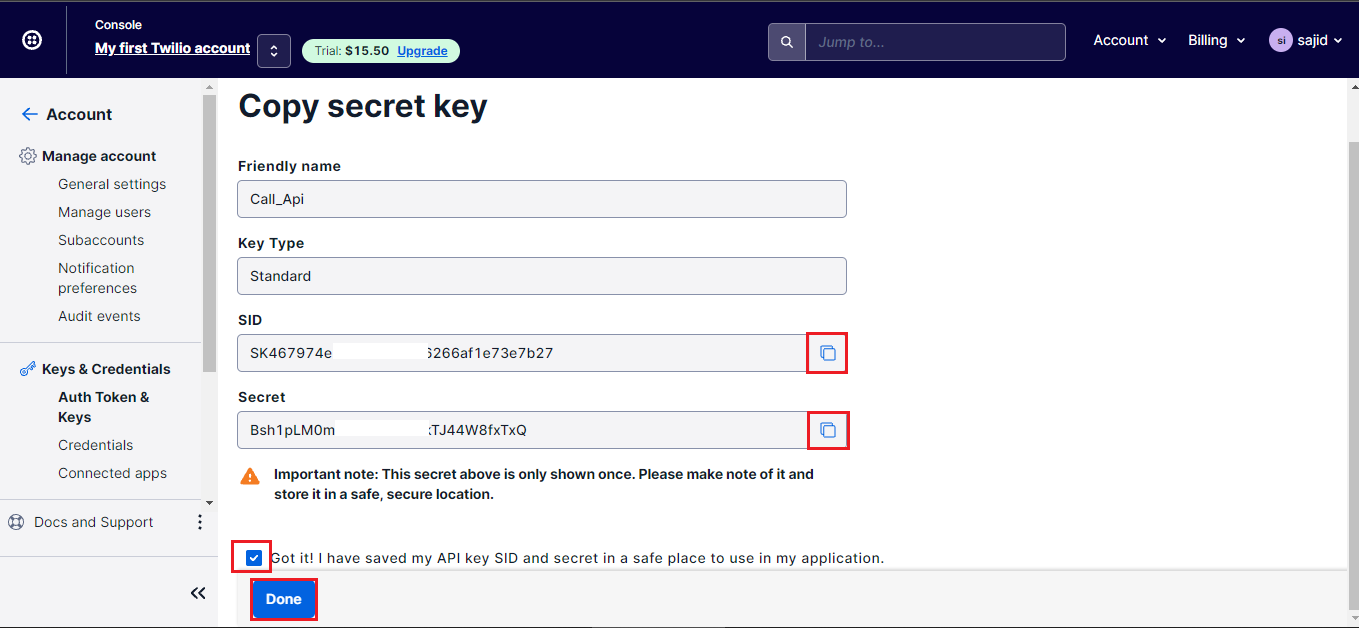
Step 4 - Save both the credentials in separate text file because it will use in next process and if you click on done button it will not show you again. So copy that.
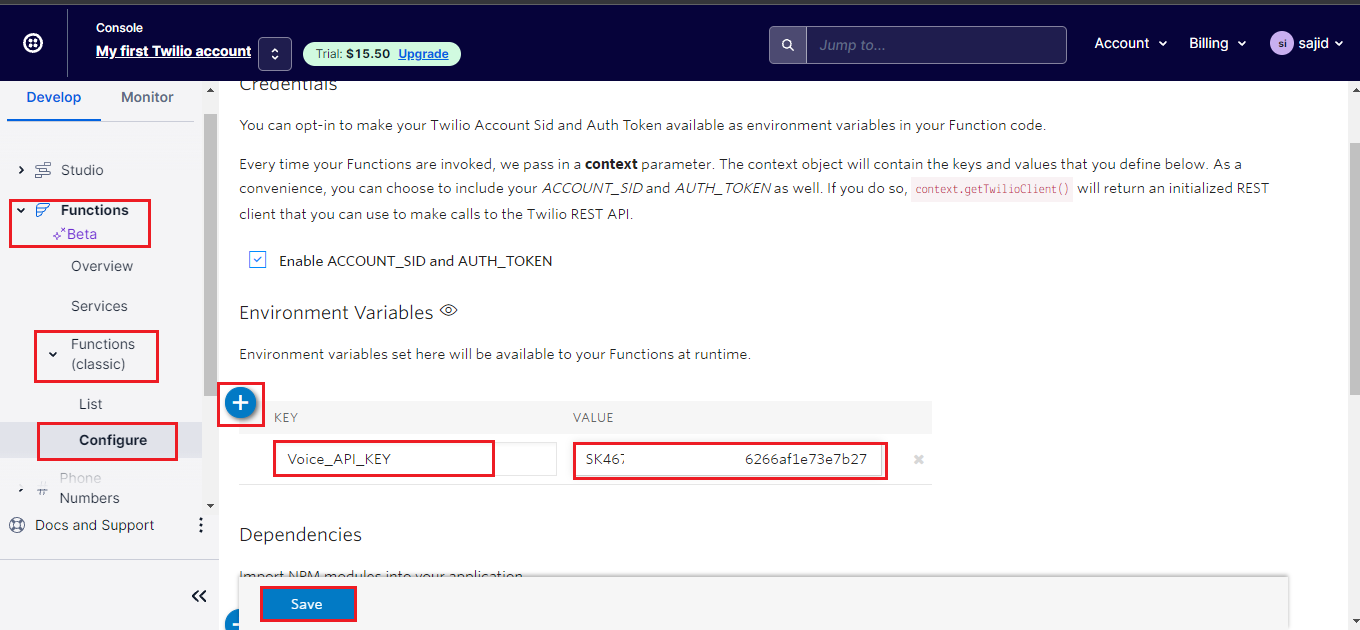
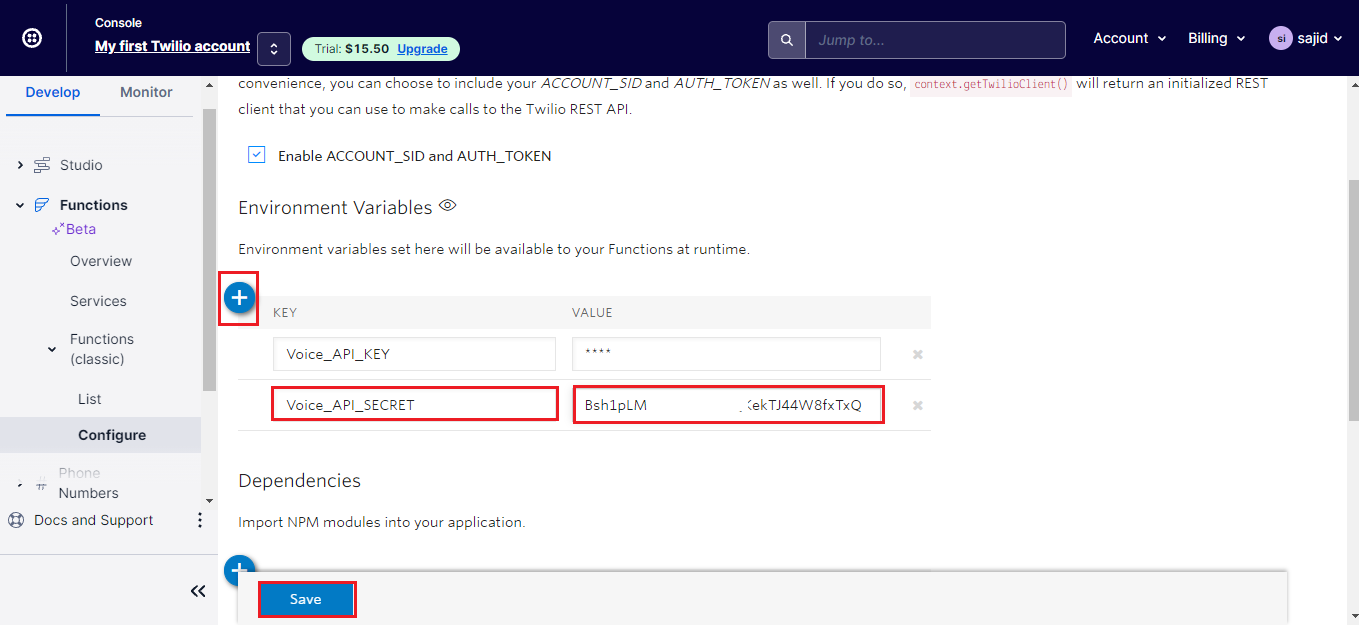
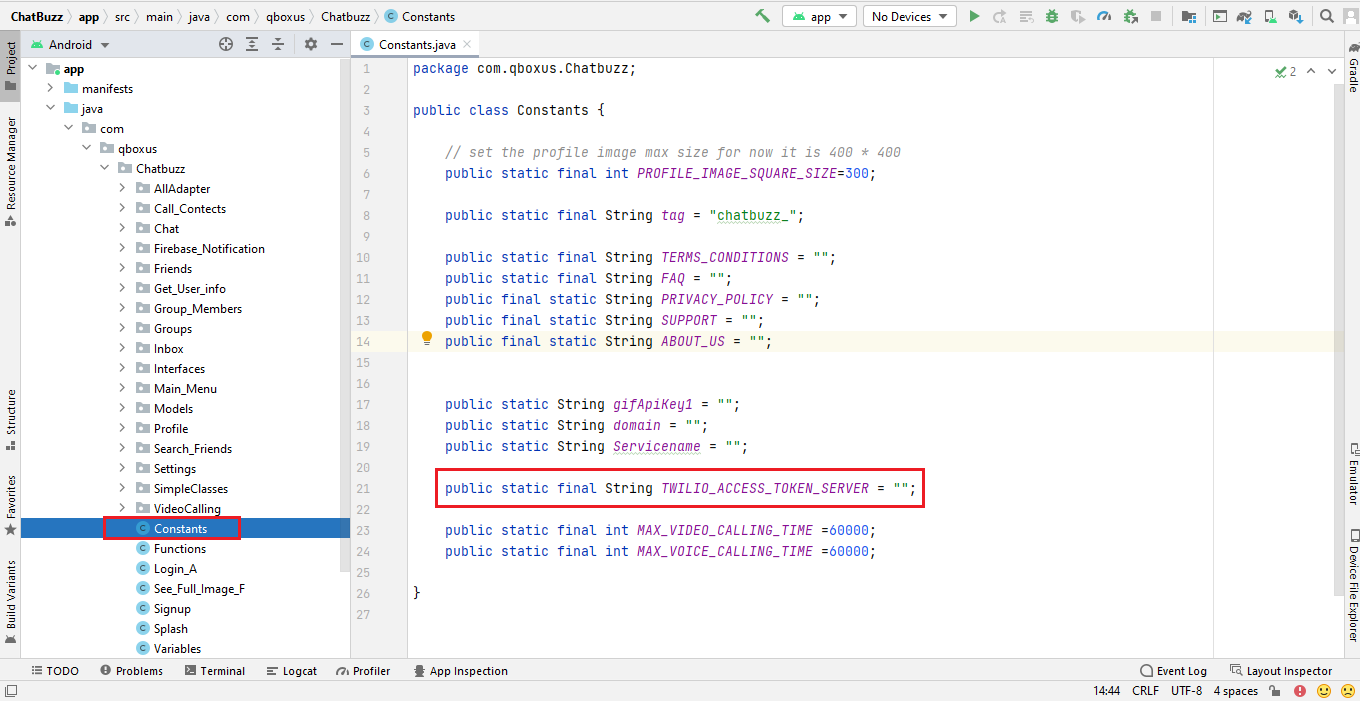
Step 6 - First declare the api key and secrete here which will use in functions code.
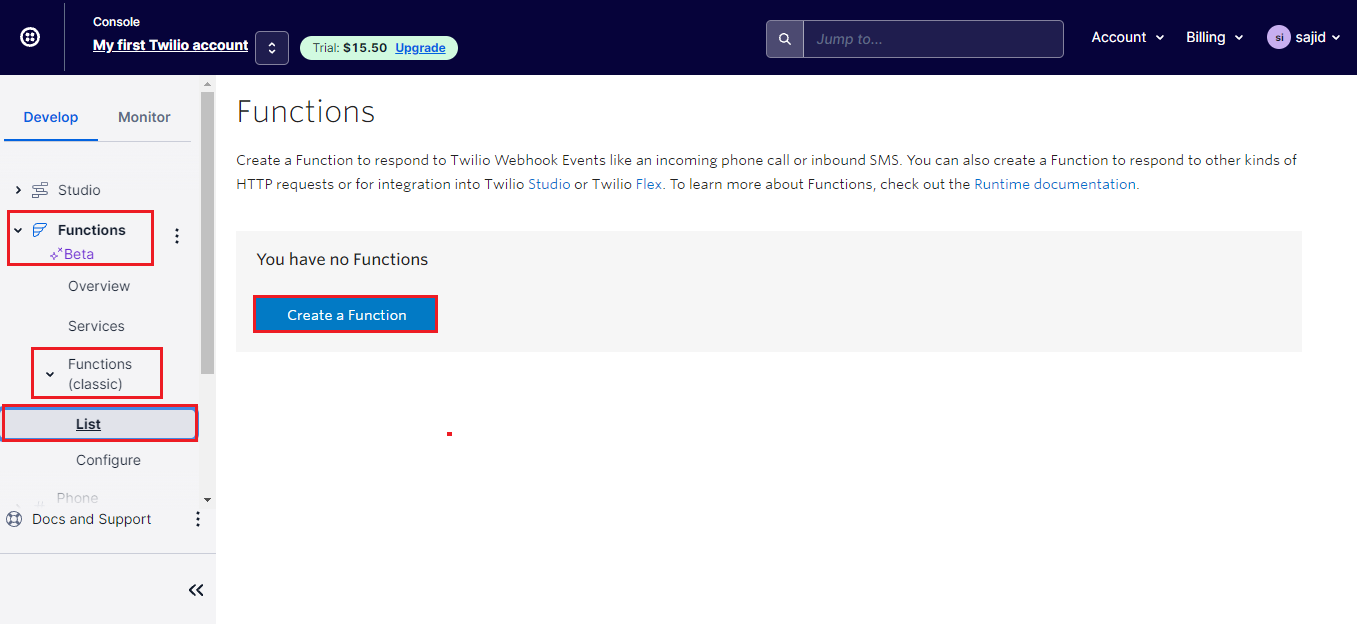
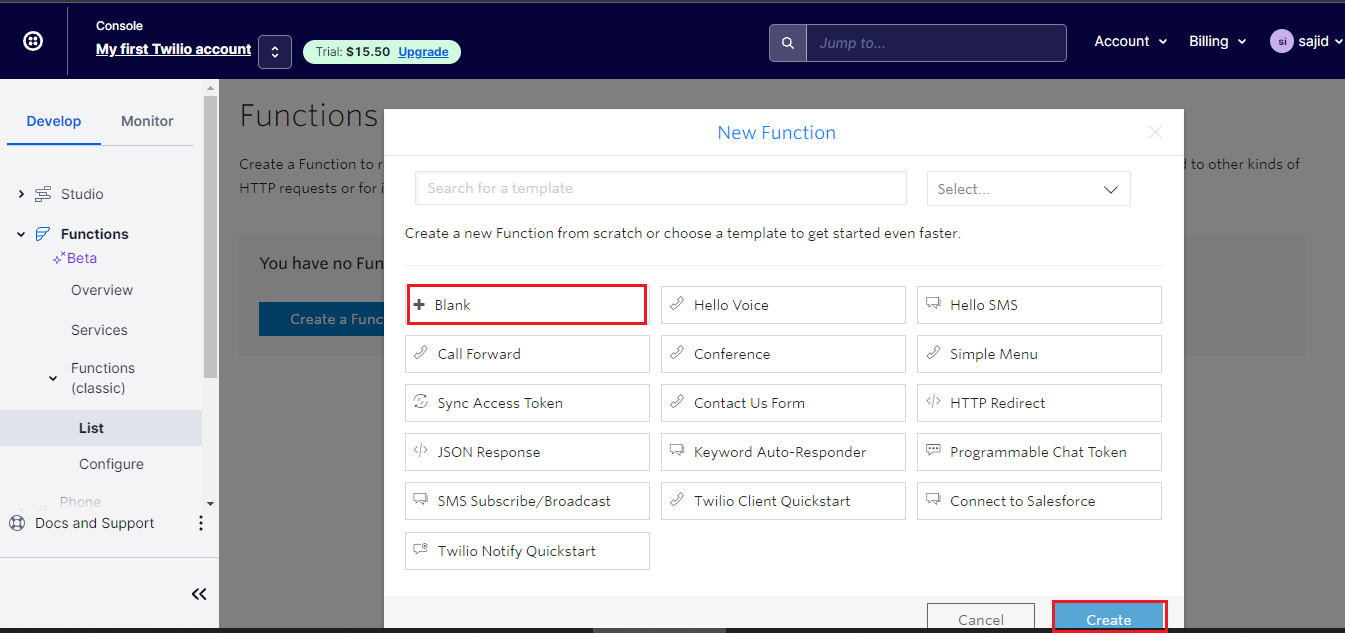
Step 7 - Now start to create a function for getting the access token which will use for calling.
									exports.handler = function(context, event, callback)

									{


									const AccessToken = require('twilio').jwt.AccessToken;

									const VideoGrant = AccessToken.VideoGrant;


									const identity = event.identity;

									const roomname =event.roomname;


									// Create Video Grant

									const videoGrant = new VideoGrant({

									room: roomname,

									});


									// Create an access token which we will sign and return to the client,

									// containing the grant we just created

									const token = new AccessToken(context.ACCOUNT_SID, context.Voice_API_KEY,
									context.Voice_API_SECRET);


									token.addGrant(videoGrant);


									token.identity = identity;


									callback(null,{token: token.toJwt()});


									};

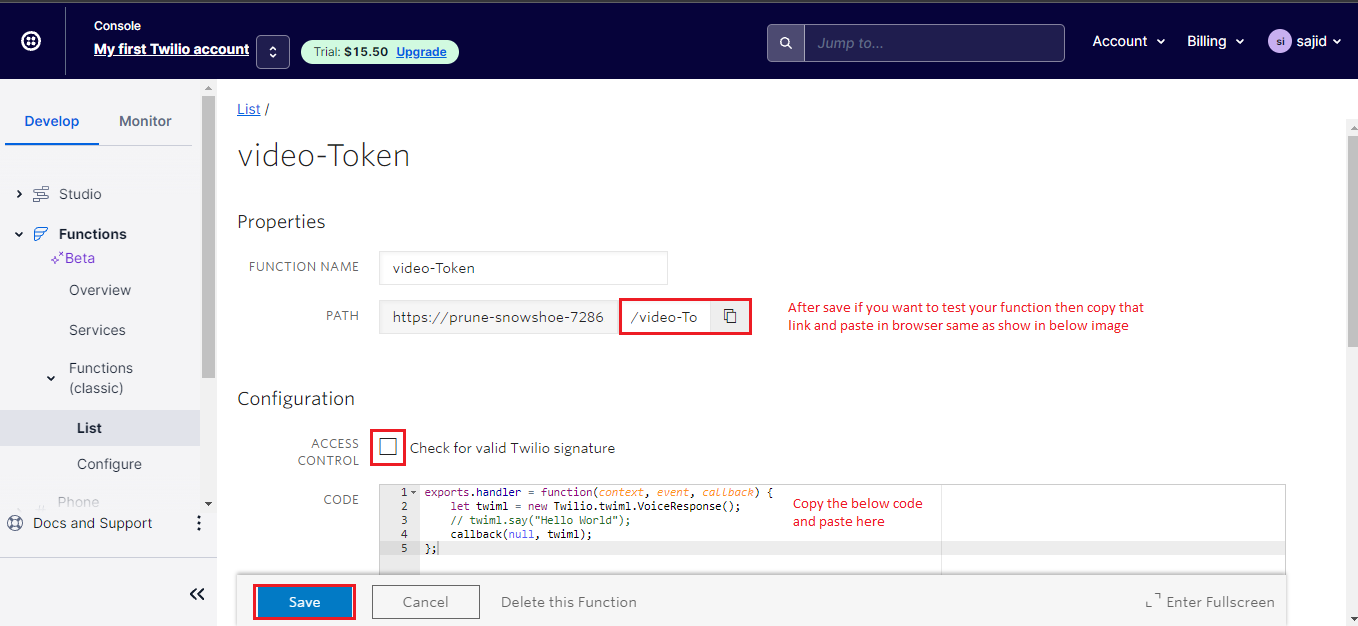
Step 8 - Place the about generated link here.
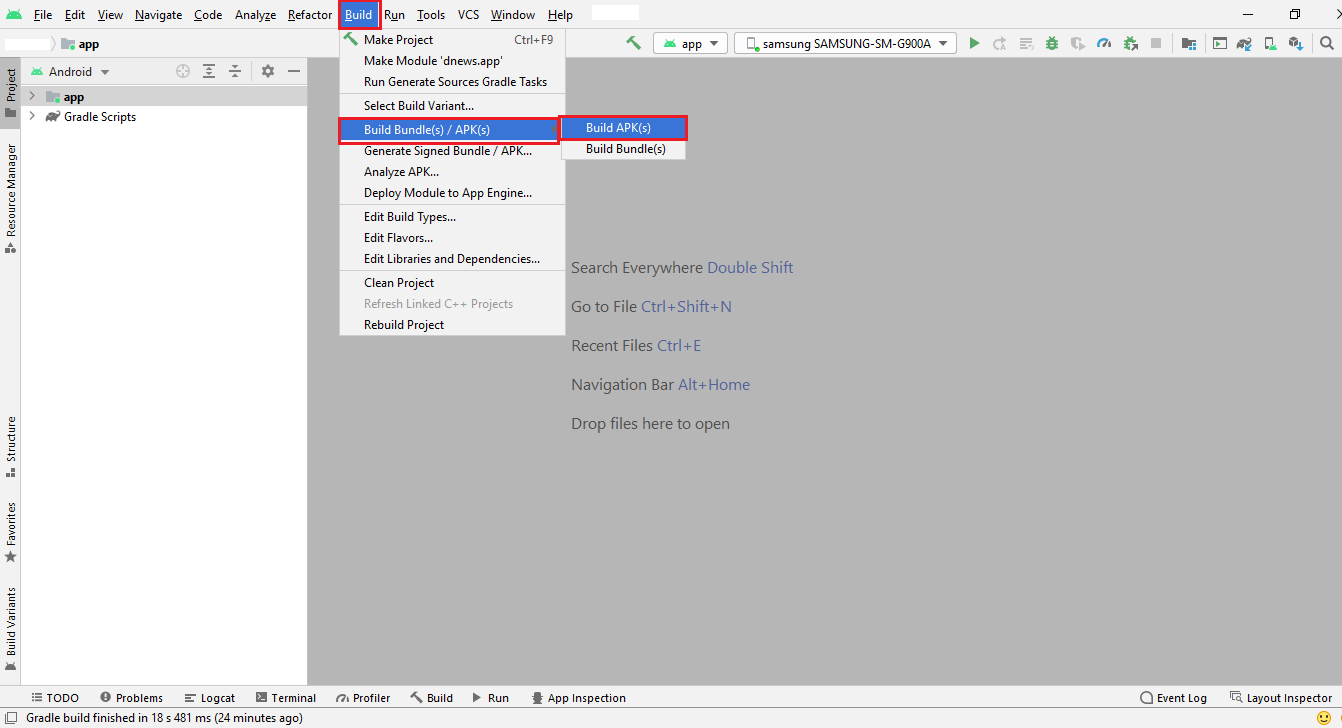
Generate Debug Apk
Step 1
Web API Configuration
installing Tictic PHP API is an easy process and we will guide you through it .
Before getting started, please make sure your web server meets all the requirements:
- Latest PHP Version 7.0
- MySQL extension (enabled on all hosts by default)
Step 1 -Upload php files which we have provided in your downloaded package from codecanyon
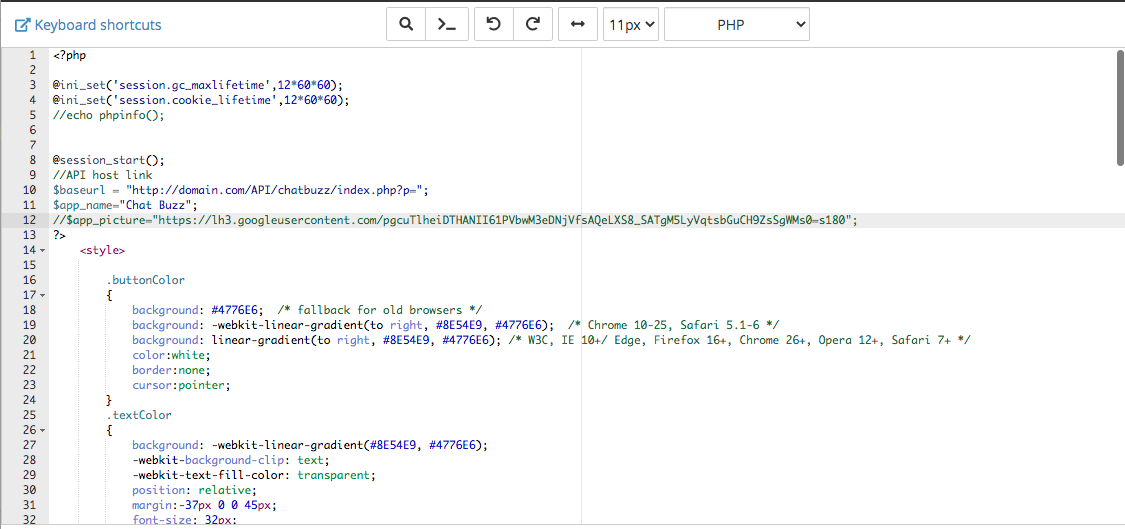
For Database & 3rd party API configurations edit constant.php file
SQL Database Setup
Step 1 -edit config.php file
Step 2 - Fill the database details in "config.php"
Fill the database details in "config.php"
$servername = "localhost";
$database = "";
$username = "";
$password = "";
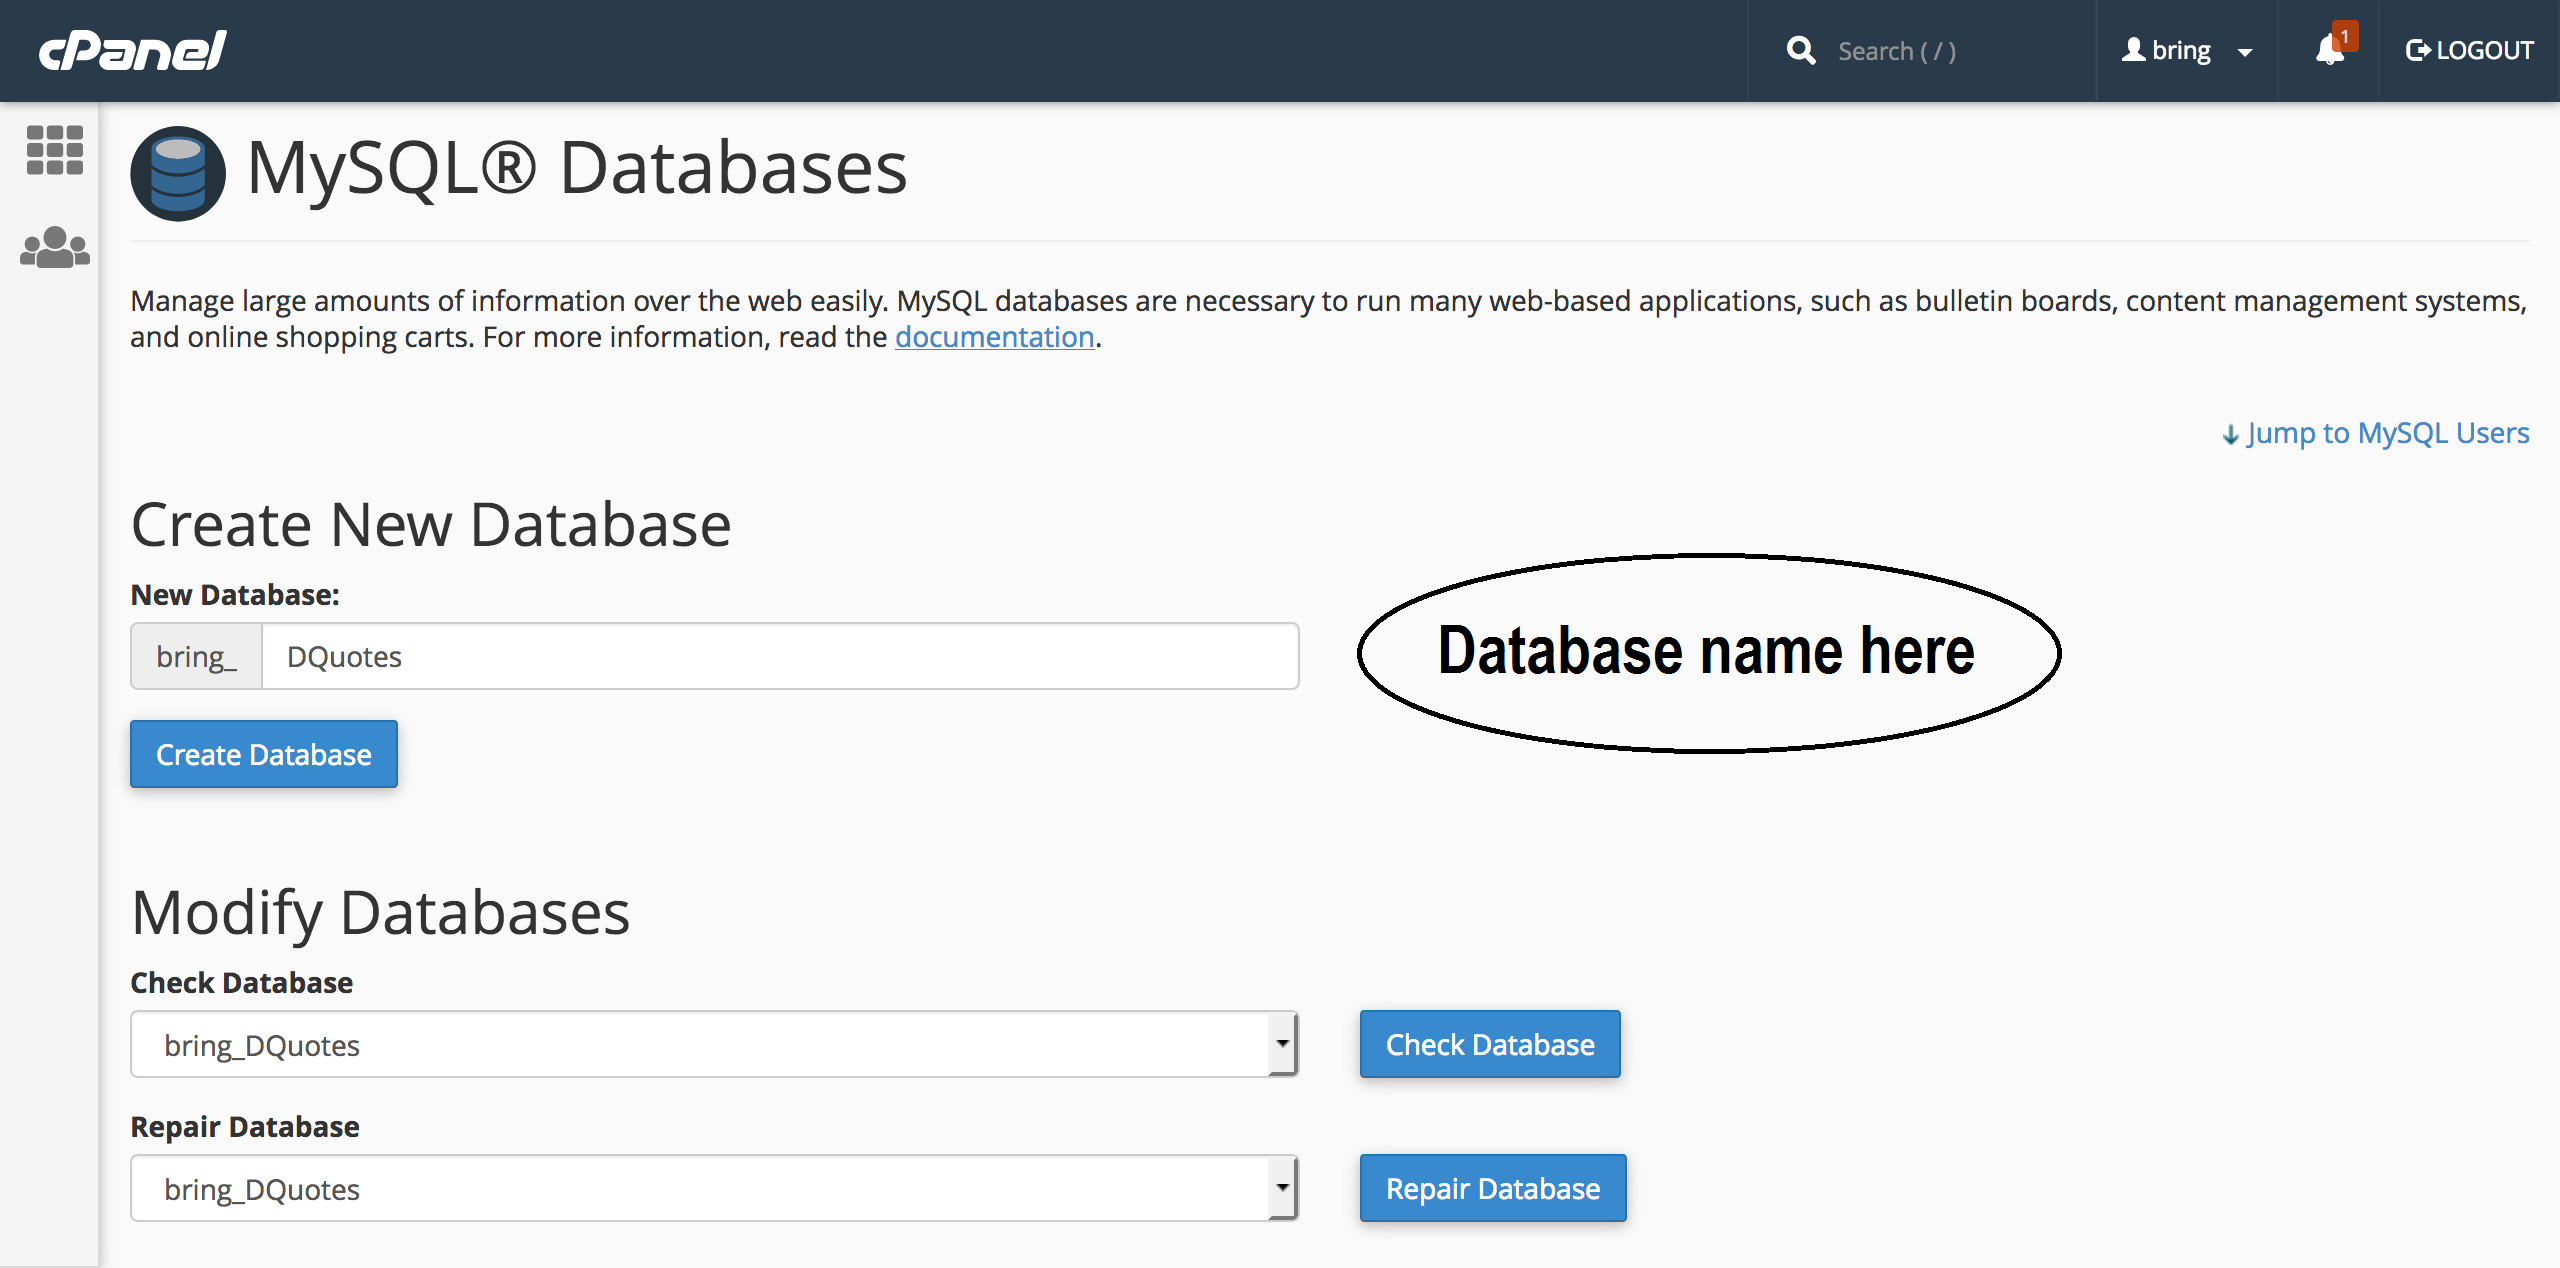
Step 3
- Create Database in mysql databases ( in cPanel ) with the name of "Tictic" you can write what ever you want
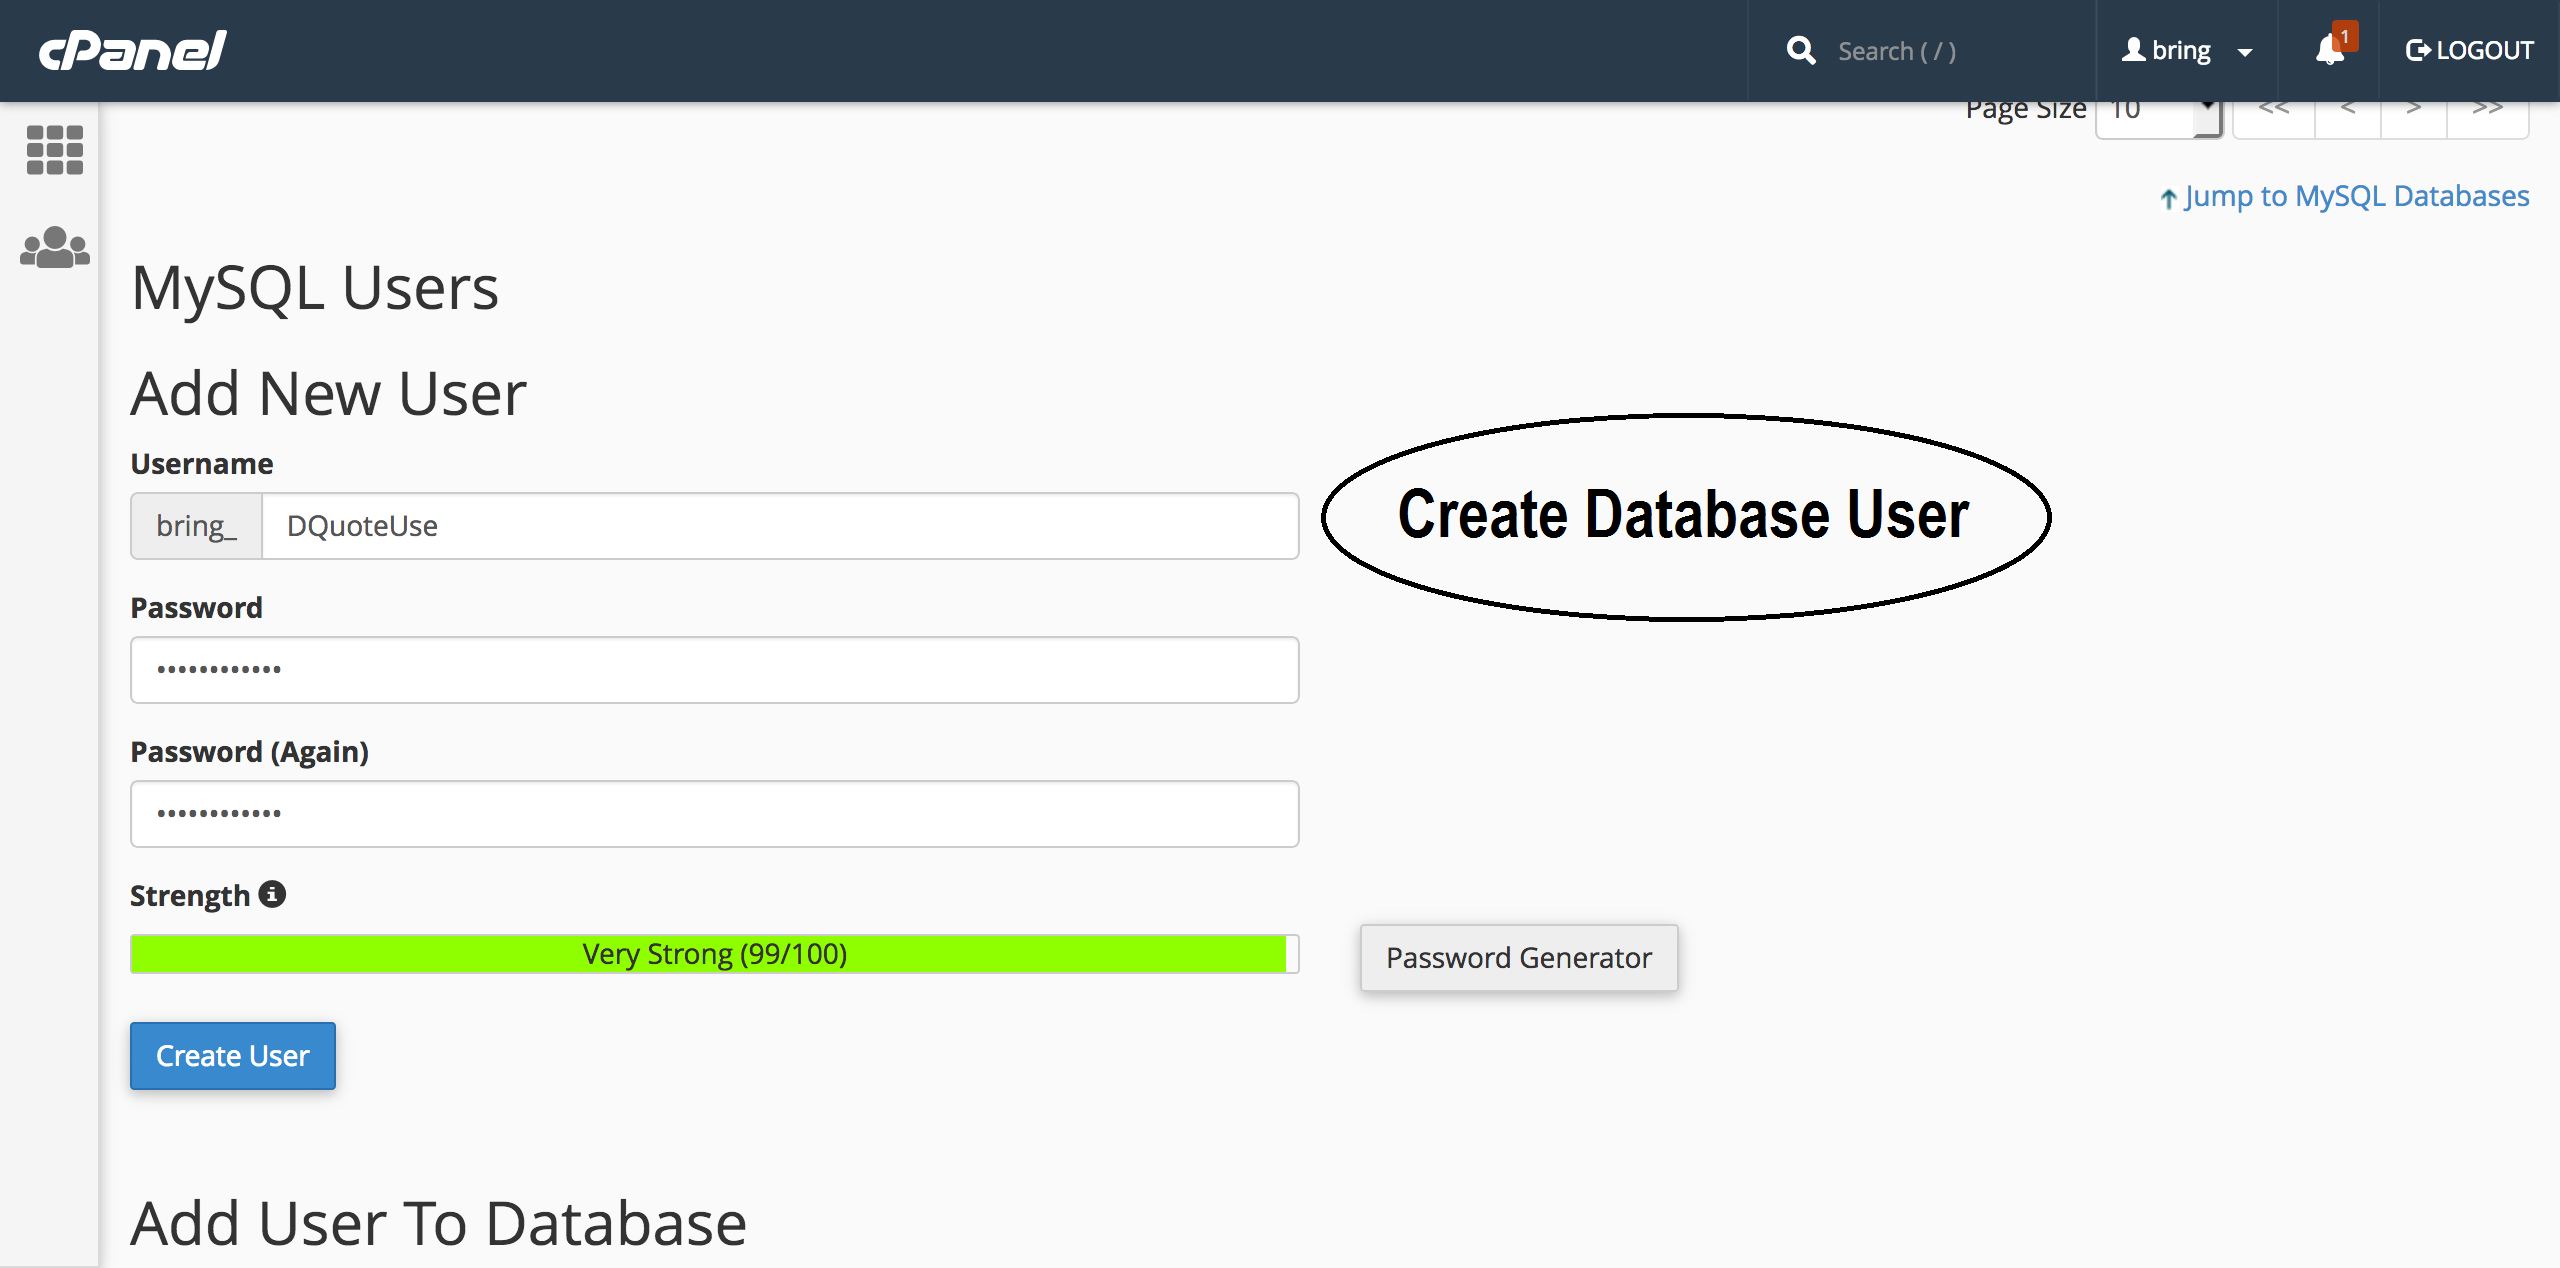
- Create a new user
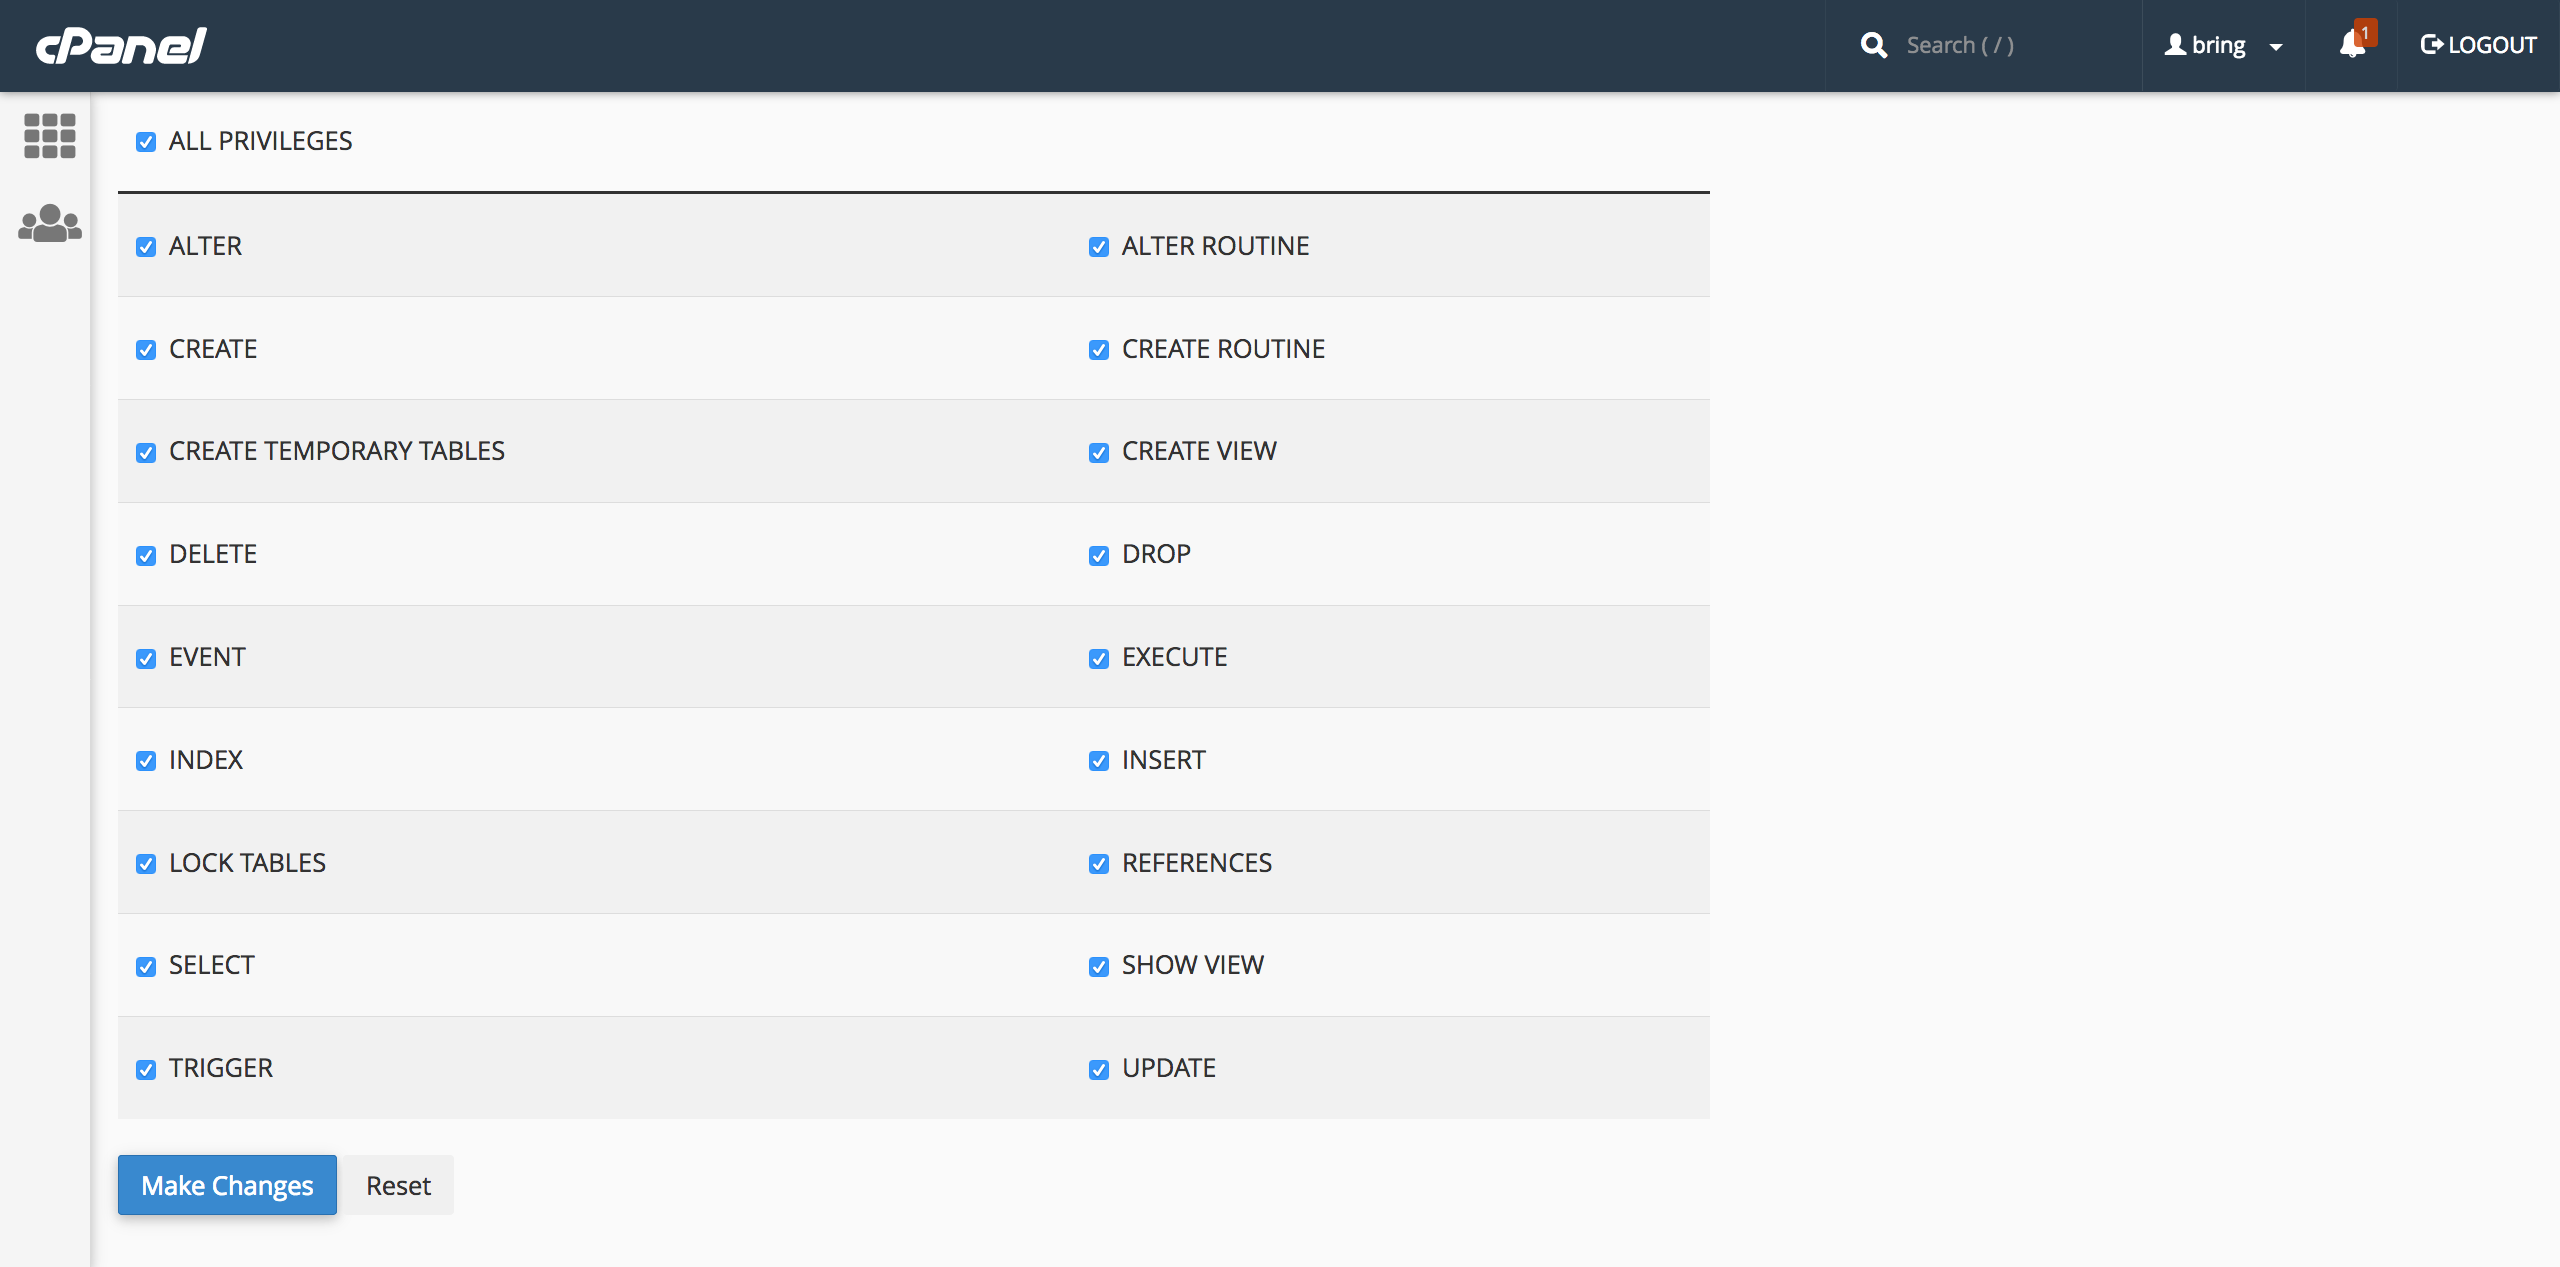
- Assign that user to database
Admin Panel Configuration
- Please put the API URL in portal/config.php that should look like "http://domain.com/chatbuzz/index.php?p="